拾色器的使用、实现


拾色器的使用、实现

前言

调研取色器组件的时候,看到原生input:color就有拾色器功能,觉得有点意思,稍微“玩”一下。

EyeDropper

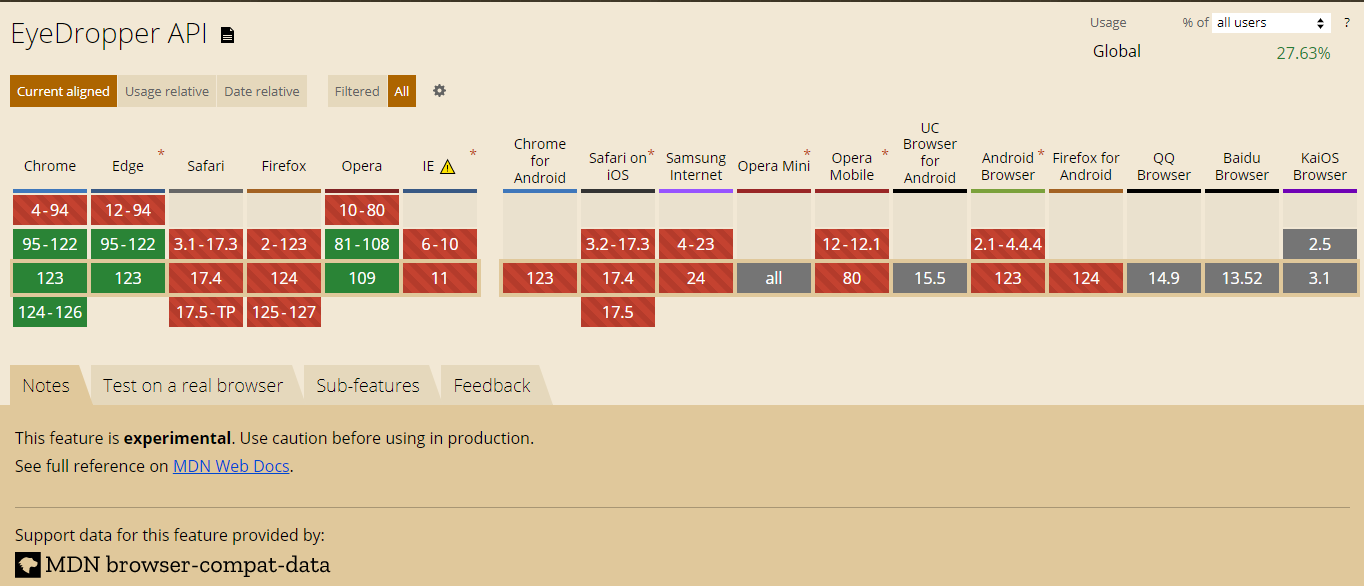
实验性技术,兼容性不是特别好。

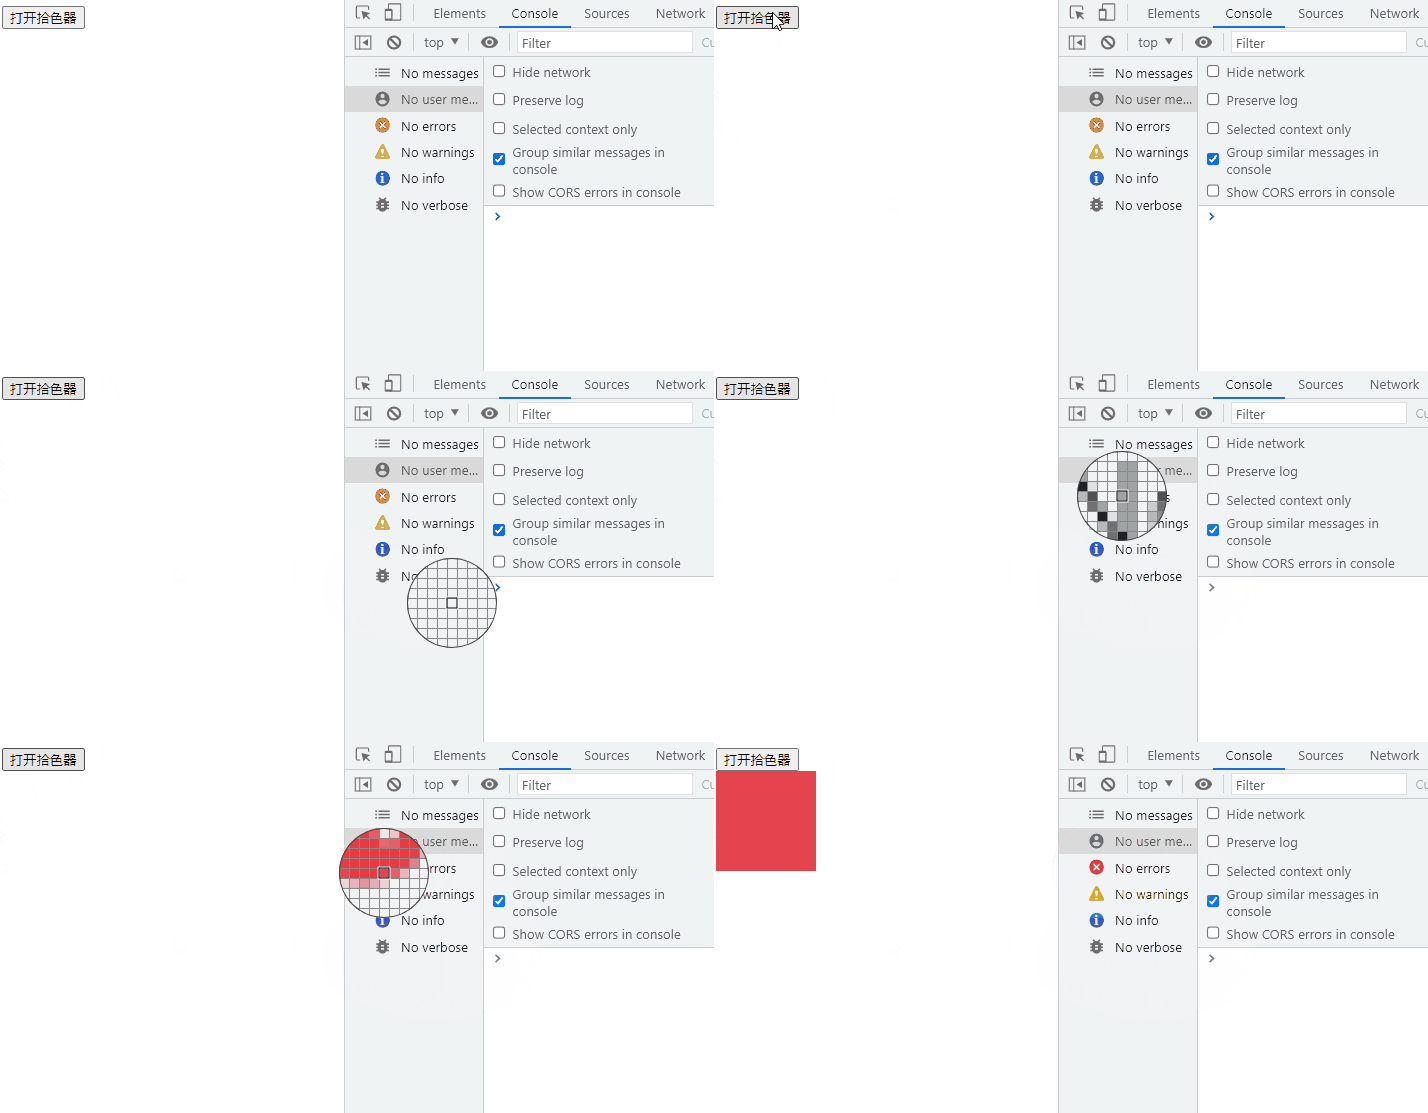
使用方法很简单,实例化一个EyeDropper对象,调用open方法即可,open方法返回Promise对象,在then方法中可以获取到拾取的颜色。

1
2
3
4
5
6
7
8
9
10
11
12
13
14
15
16
17
18
19
20
21
22
23
24
25
26
27
28
29
30
31
32
33
<!DOCTYPE html>
<html lang="en">
<head>
<meta charset="UTF-8" />
<meta name="viewport" content="width=device-width, initial-scale=1.0" />
<title>拾色器</title>
<style>
.container {
width: 100px;
height: 100px;
}
</style>
</head>

<body>
<button>打开拾色器</button>
<div class="container"></div>

<script>
document.querySelector("button").addEventListener("click", () => {
const eyeDropper = new EyeDropper();

eyeDropper
.open()
.then((result) => {
const color = result.sRGBHex;
document.querySelector(".container").style.backgroundColor = color;
})
.catch((e) => console.log(e));
});
</script>
</body>
</html>

更多

Canvas 实现

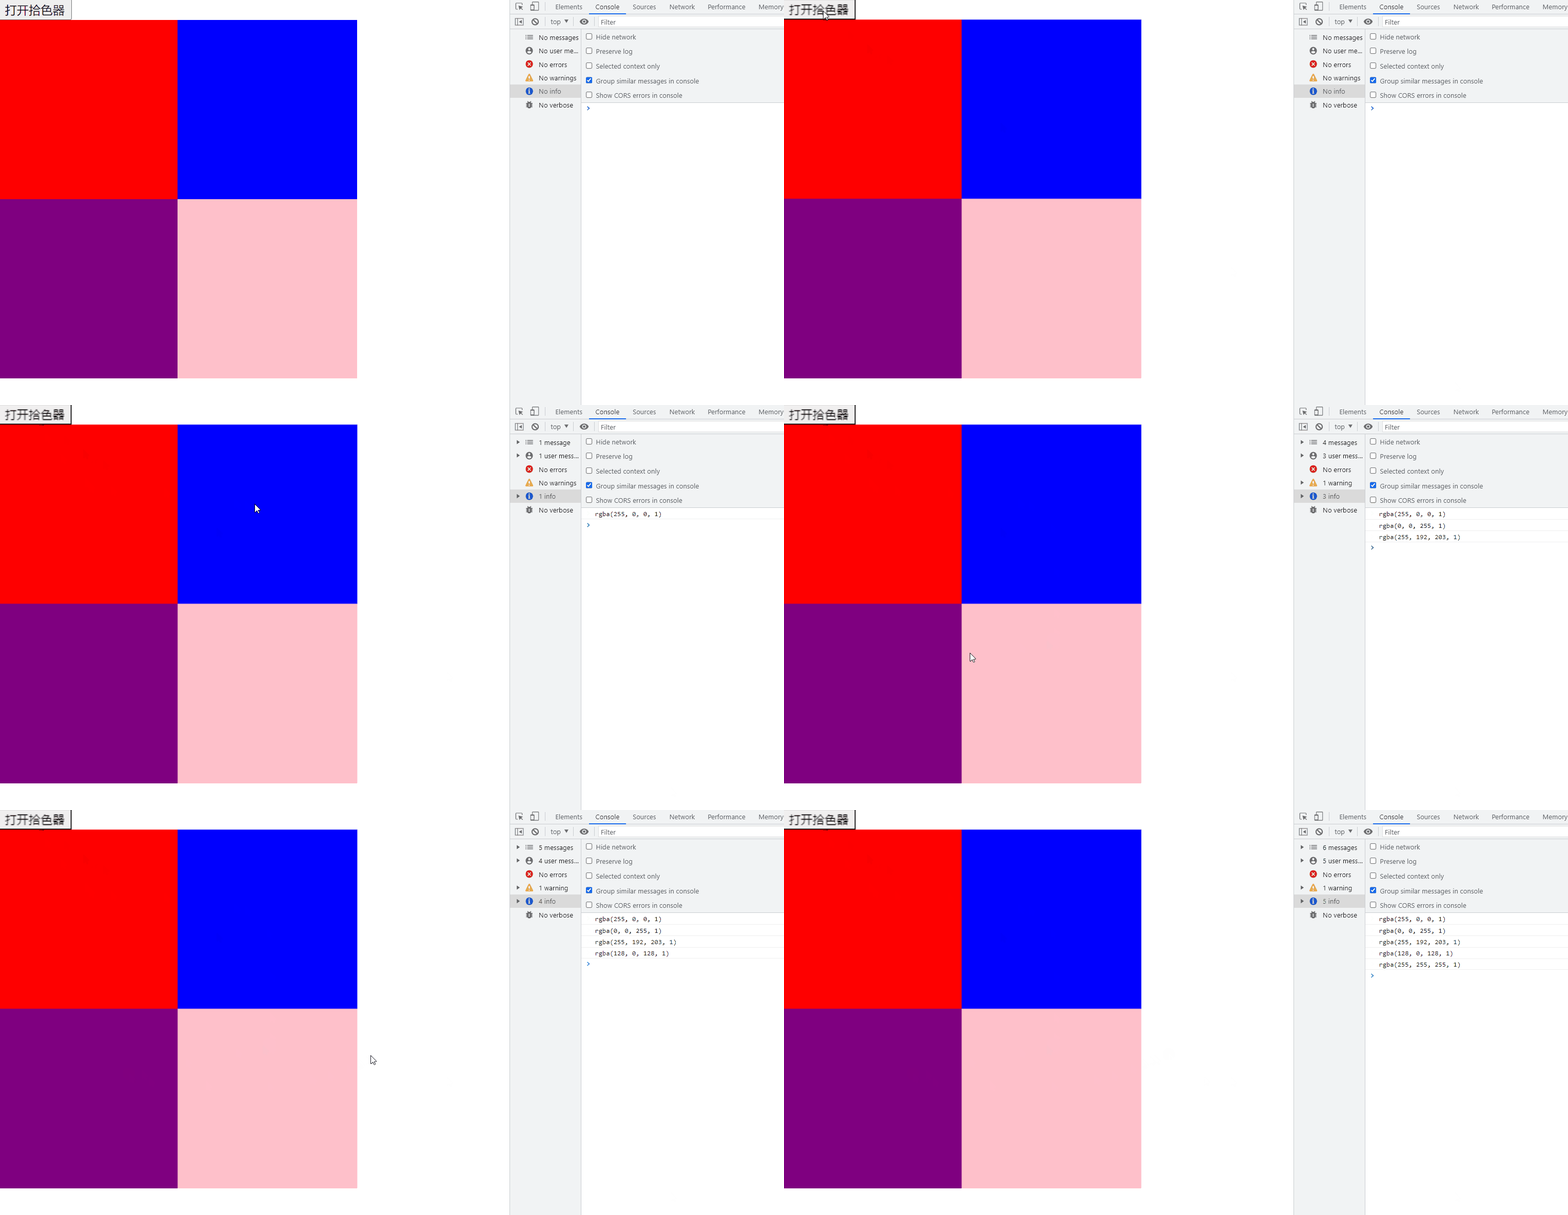
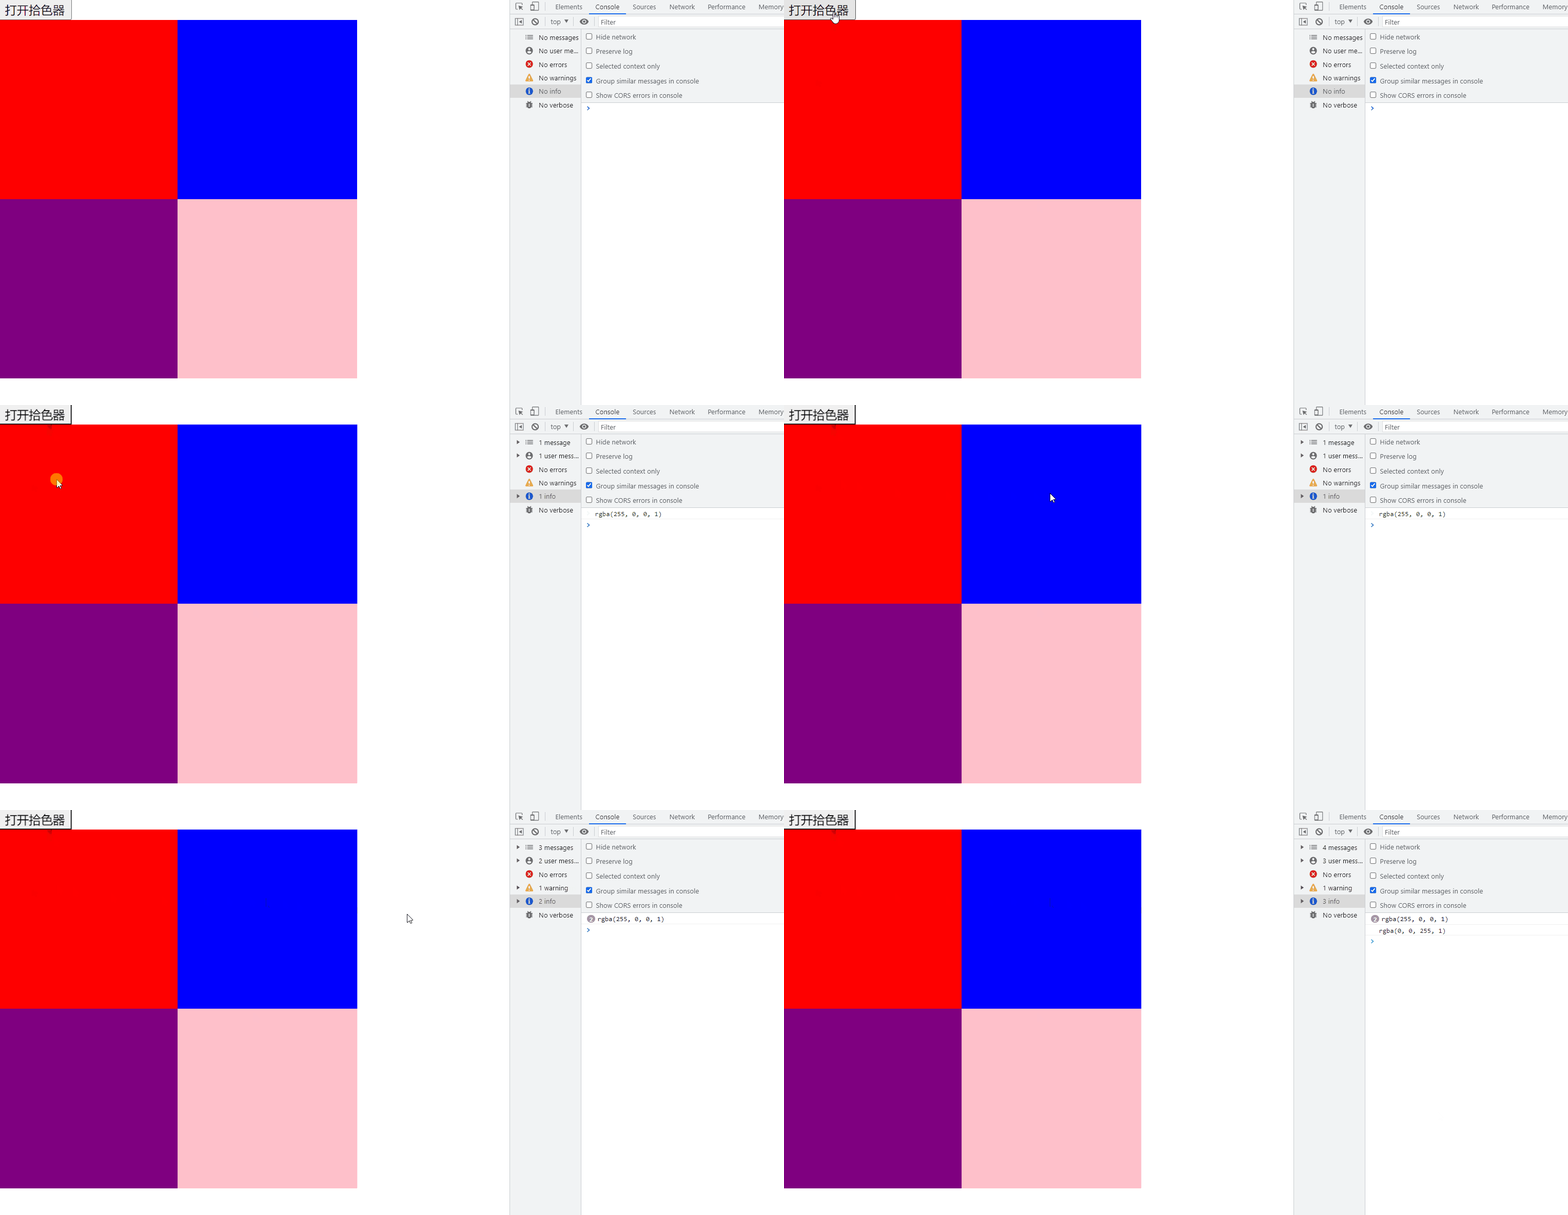
利用 dom2svg 把 dom 节点转成图片,并且绘制到 canvas 上,然后利用ctx.getImageData获取图片的颜色信息来实现。

html

1
2
3
4
5
6
7
8
9
10
<button id="open-btn">打开拾色器</button>
<div class="container">
<div class="box"></div>
</div>

<script src="./dom2svg.js"></script>
<script src="./index.js"></script>

css

1
2
3
4
5
6
7
8
9
10
11
12
13
14
15
16
17
18
19
20
21
22
23
24
25
26
27
28
29
30
31
32
33
34
35
36
37
38
39
40
41
42
43
44
45
body {
margin: 0;
padding: 0;
background: #fff;
}

.container {
display: flex;
flex-wrap: wrap;
width: 400px;
height: 400px;
}

.box {
width: 200px;
height: 200px;
}

.box:nth-child(1) {
background-color: red;
}

.box:nth-child(2) {
background-color: blue;
}

.box:nth-child(3) {
background-color: purple;
}

.box:nth-child(4) {
background-color: pink;
}

#open-btn {
cursor: pointer;
}

canvas {
position: absolute;
top: 0;
left: 0;
width: 100%;
height: 100%;
}

js

1
2
3
4
5
6
7
8
9
10
11
12
13
14
15
16
17
18
19
20
21
22
23
24
25
26
27
28
29
30
31
let canvas;
let ctx;

const handleMouseDown = (e) => {
const { data } = ctx.getImageData(e.clientX, e.clientY, 1, 1);

const [r, g, b] = data;
const a = data[3] / 255;

console.log(`rgba(${r}, ${g}, ${b}, ${a})`);
};

document.querySelector("#open-btn").addEventListener("click", async () => {
canvas = document.createElement("canvas");
const width = document.body.clientWidth;
const height = document.body.clientHeight;

canvas.width = width;
canvas.height = height;

canvas.style.width = `${width}px`;
canvas.style.height = `${height}px`;

ctx = canvas.getContext("2d");

const img = await domToSvg(document.body);
ctx.drawImage(img, 0, 0, canvas.width, canvas.height);
document.body.appendChild(canvas);

canvas.addEventListener("mousedown", handleMouseDown);
});

简单的取色器这样子就实现了。

这里插一嘴,dom2svg 后通过 canvas 的drawImage会有点糊。网上搜到的全是设置canvas的宽高放大,在但是样式不放大,就能实现一个比较好的清晰效果,但是实际上治标不治本,getImageData的时候还是会是放大后的。比如设置canvas的宽高为 2 倍,这样子,点击蓝色区域的时候,imageData还是红色,点击蓝色右边的区域的时候才是蓝色。没有找到一个能真正的避免 canvas 绘制图片不糊的方法。

如果不需要用到,ctx.getImageData这类方法,这种方式也不是不能用(确实,肉眼上看是变清晰了)

获取鼠标周围颜色信息,并放大到放大镜中

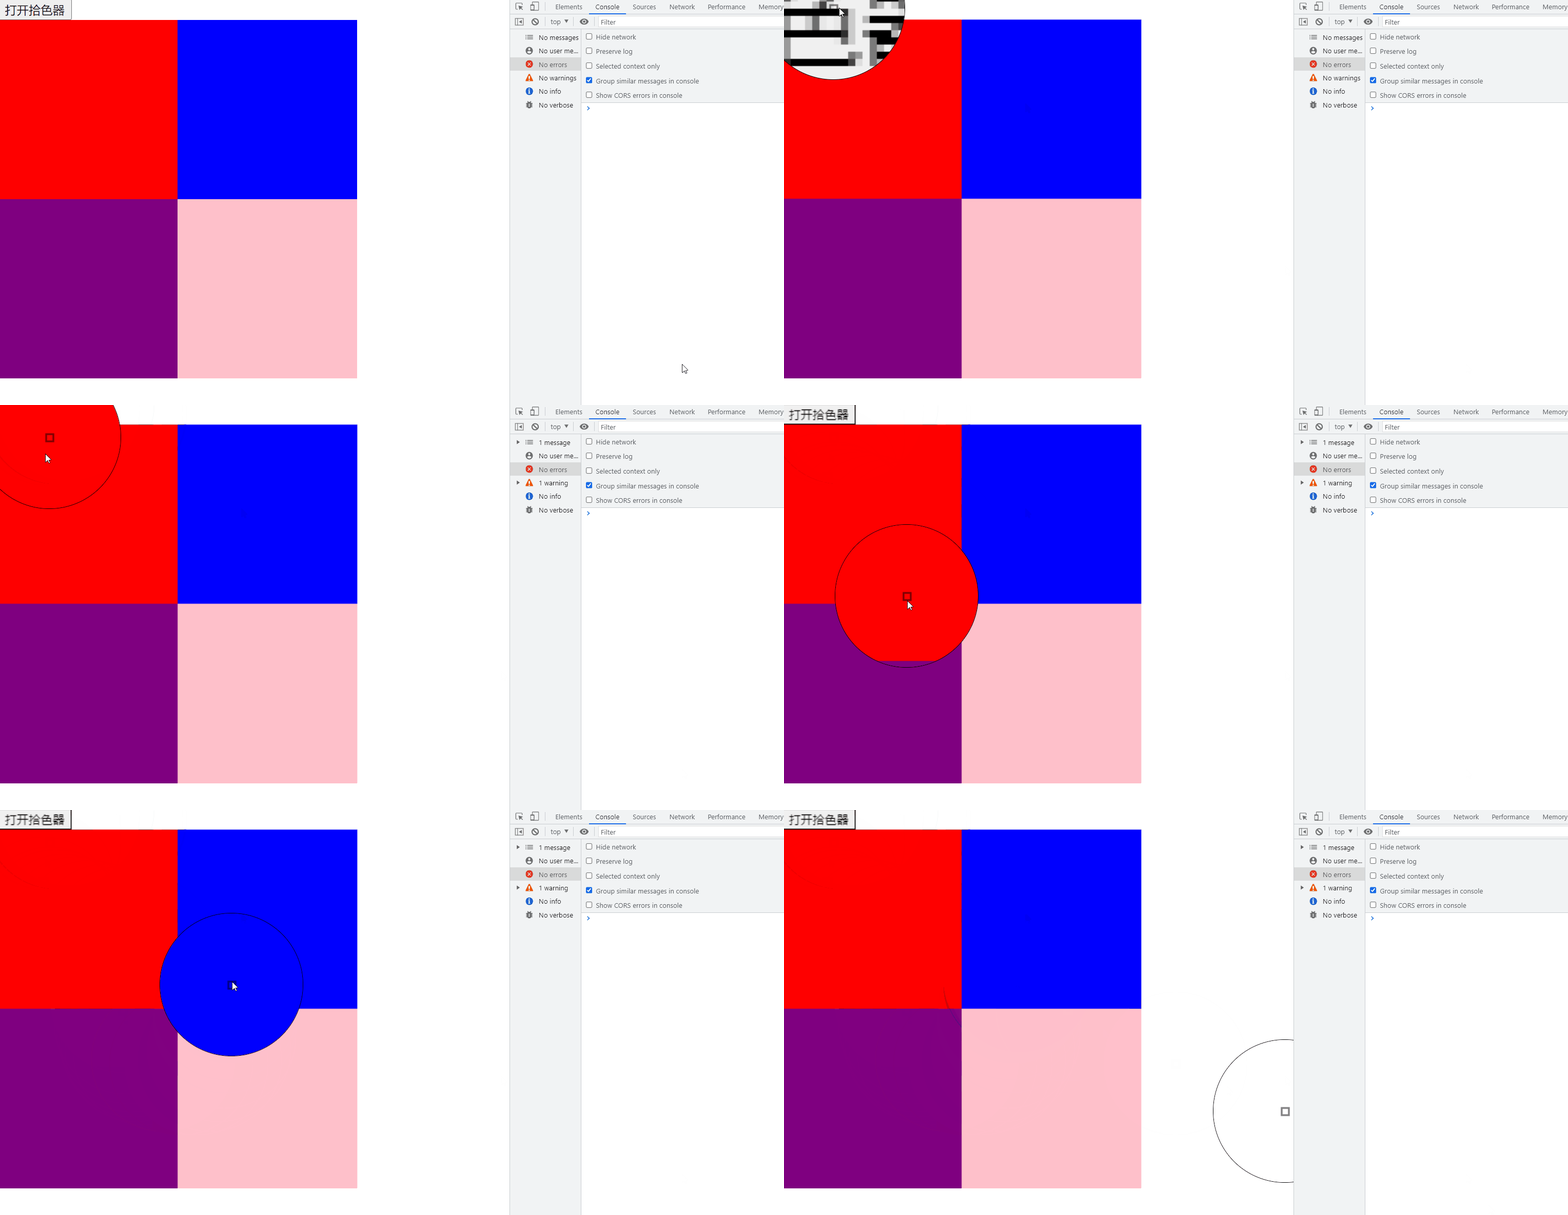
原理就是利用,getImageData获取鼠标周围指定大小区域的颜色信息,然后将颜色绘制到另一个放大镜 canvas 中,颜色信息放大,比如一个像素点的颜色变成 8 个像素点来绘制。

color-util.js

1
2
3
4
5
6
7
8
9
10
11
12
13
14
15
16
17
18
19
20
21
22
23
24
25
26
27
28
29
30
31
32
33
34
35
36
37
38
39
40
41
42
43
44
45
46
47
48
49
50
51
52
53
54
55
56
57
58
59
60
61
62
63
64
65
66
67
68
69
70
71
72
73
74
75
76
77
78
79
80
81
82
83
84
85
86
87
88
89
90
91
92
93
94
95
96
97
98
99
100
101
const getPointColor = (ctx, x, y) => {
const { data } = ctx.getImageData(x, y, 1, 1);

const [r, g, b] = data;
const a = data[3] / 255;

return `rgba(${r}, ${g}, ${b}, ${a})`;
};

const getRectColors = (ctx, x, y, size) => {
const halfSize = Math.floor(size / 2);
const { data: imageData } = ctx.getImageData(
x - halfSize,
y - halfSize,
size,
size
);

const colors = [];
for (let i = 0; i < size; i++) {
if (!colors[i]) {
colors[i] = [];
}

for (let j = 0; j < size; j++) {
const position = (size * i + j) * 4; // 获取点阵信息。公式:(width * y + x) * 4,先遍历yz轴,后遍历x轴
const r = imageData[position];
const g = imageData[position + 1];
const b = imageData[position + 2];
const a = imageData[position + 3] / 255;
colors[i][j] = `rgba(${r}, ${g}, ${b}, ${a})`;
}
}

return {
colors,
};
};

// 1个像素放大成8个像素
const drawMagnifier = (colors, size = 8) => {
const count = colors.length;

const diameter = size * count;
const radius = diameter / 2;

const canvas = document.createElement("canvas");
canvas.width = diameter;
canvas.height = diameter;

canvas.style = `
position: static;
width: ${diameter}px;
height: ${diameter}px;
`;

const ctx = canvas.getContext("2d");

colors.forEach((row, i) =>
row.forEach((color, j) => {
ctx.fillStyle = color;
ctx.fillRect(j * size, i * size, size, size);
})
);

ctx.fillStyle = "#000";
ctx.lineWidth = 1;
ctx.strokeRect(radius - size / 2, radius - size / 2, size, size);

return canvas;
};

const getColorContainer = ({ colors, containerDOM, pos }) => {
let container = containerDOM;

if (!container) {
const magnifierContainer = document.createElement("div");
container = magnifierContainer;
}

// pointer-events: none; 取消container的事件,避免影响大canvas的事件
container.style = `
position: fixed;
left: ${pos.x}px;
top: ${pos.y}px;
transform: translate(-50%, -50%);
z-index: 999;
pointer-events: none;
`;

container.innerHTML = "";

if (!container.classList.contains("maginifier-container")) {
container.classList.add("maginifier-container");
}

const maginifierCanvas = drawMagnifier(colors);
container.appendChild(maginifierCanvas);

return container;
};

添加mouseMove事件。
index.js

1
2
3
4
5
6
7
8
9
10
11
12
13
14
15
16
17
18
const handleMousemove = (e) => {
const { colors } = getRectColors(ctx, e.clientX, e.clientY, magnifierSize);
const pos = {
x: e.clientX,
y: e.clientY,
};

const colorContainer = getColorContainer({
colors,
pos,
containerDOM: magnifierContainer,
});

if (!magnifierContainer) {
magnifierContainer = colorContainer;
document.body.appendChild(colorContainer);
}
};

放大镜容器的样式。

1
2
3
4
5
6
7
8
.maginifier-container {
width: 160px;
height: 160px;
box-sizing: border-box;
border: 1px solid #000;
border-radius: 50%;
overflow: hidden;
}

完整代码

index.html

1
2
3
4
5
6
7
8
9
10
11
<button id="open-btn">打开拾色器</button>
<div class="container">
<div class="box"></div>
</div>

<script src="./dom2svg.js"></script>
<script src="./color-util.js"></script>
<script src="./index.js"></script>

dom2svg

color-util.js

1
2
3
4
5
6
7
8
9
10
11
12
13
14
15
16
17
18
19
20
21
22
23
24
25
26
27
28
29
30
31
32
33
34
35
36
37
38
39
40
41
42
43
44
45
46
47
48
49
50
51
52
53
54
55
56
57
58
59
60
61
62
63
64
65
66
67
68
69
70
71
72
73
74
75
76
77
78
79
80
81
82
83
84
85
86
87
88
89
90
91
92
93
94
95
96
97
98
99
100
101
const getPointColor = (ctx, x, y) => {
const { data } = ctx.getImageData(x, y, 1, 1);

const [r, g, b] = data;
const a = data[3] / 255;

return `rgba(${r}, ${g}, ${b}, ${a})`;
};

const getRectColors = (ctx, x, y, size) => {
const halfSize = Math.floor(size / 2);
const { data: imageData } = ctx.getImageData(
x - halfSize,
y - halfSize,
size,
size
);

const colors = [];
for (let i = 0; i < size; i++) {
if (!colors[i]) {
colors[i] = [];
}

for (let j = 0; j < size; j++) {
const position = (size * i + j) * 4; // 获取点阵信息。公式:(width * y + x) * 4,先遍历yz轴,后遍历x轴
const r = imageData[position];
const g = imageData[position + 1];
const b = imageData[position + 2];
const a = imageData[position + 3] / 255;
colors[i][j] = `rgba(${r}, ${g}, ${b}, ${a})`;
}
}

return {
colors,
};
};

// 1个像素放大成8个像素
const drawMagnifier = (colors, size = 8) => {
const count = colors.length;

const diameter = size * count;
const radius = diameter / 2;

const canvas = document.createElement("canvas");
canvas.width = diameter;
canvas.height = diameter;

canvas.style = `
position: static;
width: ${diameter}px;
height: ${diameter}px;
`;

const ctx = canvas.getContext("2d");

colors.forEach((row, i) =>
row.forEach((color, j) => {
ctx.fillStyle = color;
ctx.fillRect(j * size, i * size, size, size);
})
);

ctx.fillStyle = "#000";
ctx.lineWidth = 1;
ctx.strokeRect(radius - size / 2, radius - size / 2, size, size);

return canvas;
};

const getColorContainer = ({ colors, containerDOM, pos }) => {
let container = containerDOM;

if (!container) {
const magnifierContainer = document.createElement("div");
container = magnifierContainer;
}

// pointer-events: none; 取消container的事件,避免影响大canvas的事件
container.style = `
position: fixed;
left: ${pos.x}px;
top: ${pos.y}px;
transform: translate(-50%, -50%);
z-index: 999;
pointer-events: none;
`;

container.innerHTML = "";

if (!container.classList.contains("maginifier-container")) {
container.classList.add("maginifier-container");
}

const maginifierCanvas = drawMagnifier(colors);
container.appendChild(maginifierCanvas);

return container;
};

index.js

1
2
3
4
5
6
7
8
9
10
11
12
13
14
15
16
17
18
19
20
21
22
23
24
25
26
27
28
29
30
31
32
33
34
35
36
37
38
39
40
41
42
43
44
45
46
47
48
49
50
51
52
53
54
55
let canvas;
let ctx;

let magnifierContainer = null;
const magnifierSize = 20;

const handleMousemove = (e) => {
const { colors } = getRectColors(ctx, e.clientX, e.clientY, magnifierSize);
const pos = {
x: e.clientX,
y: e.clientY,
};

const colorContainer = getColorContainer({
colors,
pos,
containerDOM: magnifierContainer,
});

if (!magnifierContainer) {
magnifierContainer = colorContainer;
document.body.appendChild(colorContainer);
}
};

const handleMouseDown = (e) => {
const color = getPointColor(ctx, e.clientX, e.clientY);
console.log(color);

document.body.removeChild(document.querySelector("canvas"));

magnifierContainer = null;
document.body.removeChild(document.querySelector(".maginifier-container"));
};

document.querySelector("#open-btn").addEventListener("click", async () => {
canvas = document.createElement("canvas");
const width = document.body.clientWidth;
const height = document.body.clientHeight;

canvas.width = width;
canvas.height = height;

canvas.style.width = `${width}px`;
canvas.style.height = `${height}px`;

ctx = canvas.getContext("2d");

const img = await domToSvg(document.body);
ctx.drawImage(img, 0, 0, canvas.width, canvas.height);
document.body.appendChild(canvas);

canvas.addEventListener("mousemove", handleMousemove);
canvas.addEventListener("mousedown", handleMouseDown);
});

文章作者: 赤蓝紫
版权声明: 本博客所有文章除特別声明外,均采用 CC BY 4.0 许可协议。转载请注明来源 赤蓝紫 !
评论
  目录