fluentffmpeg 实现音频的“无损”转换
前言
使用 ffmpeg 可以实现音频的格式转换,但是参数默认是 ffmpeg 自动设置的。所以会出现问题。
比如通过ffmpeg -i x.flac y.mp3将实现格式转换。

首先,从大小上就能看出来进行一些压缩了,这个实际上听不出来的话,还是不算很大的问题。
但是,有一些情况就很离谱。比如上面这个音频转换后,时长就变长了,后面都是静音的。


使用 ffprobe
FFmpeg 转换音视频格式时,如何做到保质保量?
从上面的这篇文章,可以找到解决方案,通过ffprobe获取源文件信息,然后进行转换的时候使用原本的配置。
($\color{red}注意:$)
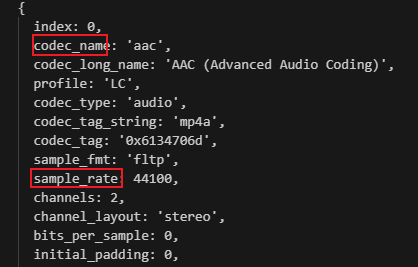
个人尝试后发现,aac 格式转换为 mp3 格式,如果设置原本的 aac 编解码器,会导致问题。经过询问 gpt,aac 格式转换 mp3 格式并不支持使用原本的 aac 编解码器,而是要用libmp3lame。而 ffmpeg 转换为 mp3 就是默认使用的libmp3lame。所以不再设置相关的编解码器配置。有额外需求可以自己研究。
根据一些音频转换网站的使用情况来看,比特率、采样率这两个配置会比较影响到音频的质量。(不保证是正确,猜测)
获取原文件的配置信息
1
2
3
4
5
6
7
8
9
10
11
12
13
14
15
16
| import ffmpeg from "fluent-ffmpeg";
import ffmpegInstaller from "@ffmpeg-installer/ffmpeg";
import ffprobeInstaller from "@ffprobe-installer/ffprobe";
ffmpeg.setFfmpegPath(ffmpegInstaller.path);
ffmpeg.setFfprobePath(ffprobeInstaller.path);
const { ffprobe } = ffmpeg;
ffprobe("./x.flac", (err, data) => {
for (const stream of data.streams) {
console.log(stream);
}
});
|

利用原配置信息来进行参数配置
1
2
3
4
5
6
7
8
9
10
11
12
13
14
15
16
17
18
19
20
21
22
23
24
25
26
27
28
29
30
31
32
33
34
35
36
37
38
39
40
41
| import ffmpeg from "fluent-ffmpeg";
import ffmpegInstaller from "@ffmpeg-installer/ffmpeg";
import ffprobeInstaller from "@ffprobe-installer/ffprobe";
ffmpeg.setFfmpegPath(ffmpegInstaller.path);
ffmpeg.setFfprobePath(ffprobeInstaller.path);
const command = ffmpeg();
const { ffprobe } = ffmpeg;
ffprobe("./x.flac", (err, data) => {
let outputOptions;
for (const stream of data.streams) {
const codecType = stream.codec_type;
if (codecType === "audio") {
const bitRate = stream.bit_rate;
const sampleRate = stream.sample_rate;
const channels = stream.channels;
const channelLayout = stream.channel_layout;
outputOptions = [
`-b:a ${bitRate}`,
`-ar ${sampleRate}`,
`-ac ${channels}`,
`-channel_layout ${channelLayout}`,
];
}
}
command
.input("./x.flac")
.outputOptions(outputOptions)
.save("./output.mp3")
.on("end", () => {
console.log("转换完成");
});
});
|

大小没啥变化。

最重要的时长也没变化,本人没啥音感,也听不出有什么大问题。


