工作的一些问题记录(一) TypeScript tsconfig.js 配置路径别名 1 2 3 4 5 6 7 8 9 10 { "compilerOptions" : { "module" : "Node16" , "moduleResolution" : "Node16" , "baseUrl" : "." , "paths" : { "@/*" : [ "./src/*" ] } } }
keyof typeof 工作原理
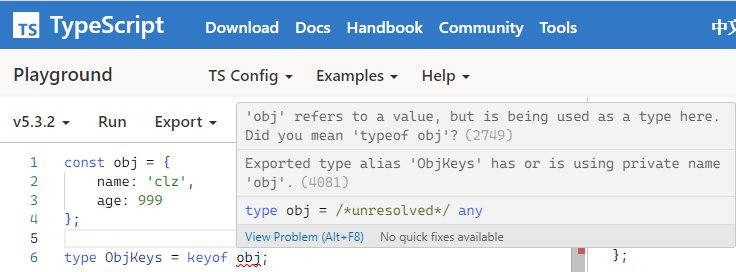
typeof 可以获取一个值的类型,typeof obj 会返回 obj 的类型。
1 2 3 4 5 6 7 const obj = {name : "clz" ,age : 999 ,type ObjType = typeof obj;
keyof可以获取一个类型的所有属性名的联合类型。
1 2 3 4 5 6 7 8 9 const obj = {name : "clz" ,age : 999 ,type ObjType = typeof obj;type ObjKeys = keyof ObjType ;
keyof只能对类型使用,而不能对值使用。
Docusaurus 配置别名 docusaurus.config.js
1 2 3 4 5 6 7 8 const customWebpack = require ("./plugins/custom-webpack" );const config = {plugins : [customWebpack],
plugins/custom-webpack/index.js
1 2 3 4 5 6 7 8 9 10 11 12 13 14 15 16 17 18 19 20 21 22 23 24 25 const path = require ("path" );const resolve = (dir ) => path.resolve (__dirname, dir);module .exports = function (context, options ) {return {name : "custom-webpack" ,configureWebpack (config, isServer, utils ) {resolve .alias = {resolve .alias ,"@" : resolve ("../../src" ),console .log (config.resolve .alias );return {resolve : {alias : {"@" : resolve ("../../src" ),
添加好 webpack 的 alias 配置后只是功能能正常使用了,但是还是会类型报错:
这时候就要在tsconfig.json中设置路径别名,来解决类型报错:
1 2 3 4 5 6 7 8 9 10 11 12 { "extends" : "@tsconfig/docusaurus/tsconfig.json" , "compilerOptions" : { "module" : "Node16" , "moduleResolution" : "Node16" , "baseUrl" : "." , "paths" : { "@/*" : [ "./src/*" ] } } }
docusaurus 无法使用 window
使用ExecutionEnvironment.canUseDOM来判断,只有能使用 DOM 的时候才会执行需要用到window部分的代码。
1 2 3 4 5 6 7 import ExecutionEnvironment from "@docusaurus/ExecutionEnvironment" ;if (!ExecutionEnvironment .canUseDOM ) {return ;useEffect (() => {}, [window .location .href ]);
executionenvironment
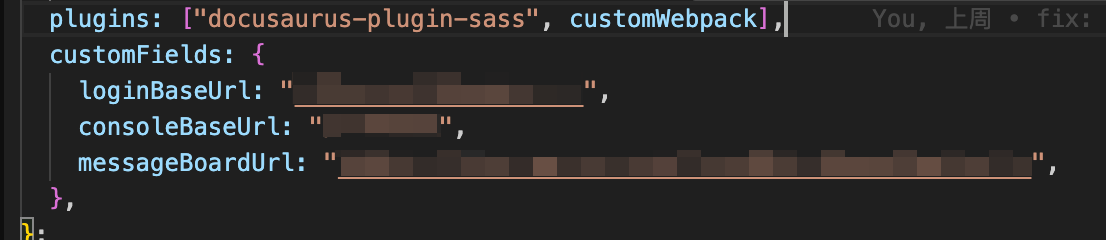
dev 跟 pro 两套配置 不同的部分放在customFields中。然后dev跟pro的配置就只有customFields这部分不同,可以将相同部分配置抽离。
git cherry-pick
可以将某个分支的某次提交复制到当前分支。
应用场景:有两条分支dev和master,分别对应测试环境跟正式环境。测试环境加了几个功能,要求只上线某个功能,其他的后续再上线。(比如测试还没来的测其他的各种原因)
b 分支
1 2 git log
main 分支
1 2 git log
main 分支执行git cherry-pick 1f76a5c7e69de351d1fa9a2549efc00a6cd8ce38
1 2 3 git log
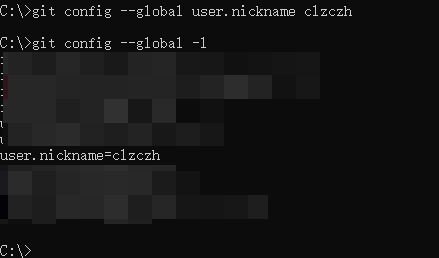
git 查看配置,并清除指定配置 查看配置
清除指定配置
1 git config --global --unset user.nickname
github ssh 无法连接 在 HTTPS 端口使用 SSH - GitHub 文档
包管理器 将本地插件安装到 node_modules 中
依赖不再是版本号,而是file:前缀,指明是本地。并且要是是文件夹。
package.json
1 2 3 4 5 {"dependencies" : {"custom-webpack" : "file:plugins/custom-webpack"
这样就可以很方便地引入插件了。完全不需要管层级问题
1 2 const customWebpack = require ("custom-webpack" );
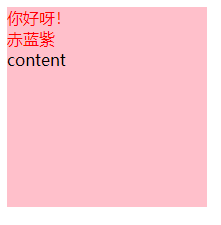
H5 伪元素写多行内容 1 2 3 <div class ="box" > <div class ="content" > content</div > </div >
1 2 3 4 5 6 7 8 9 10 11 .box {width : 200px ;height : 200px ;background-color : pink;.content ::before {content : "你好呀!\A赤蓝紫\A" ;color : red;white-space : pre;
伪元素可以通过\A换行,前提是设置white-space为pre
svg 设置成父元素来设置颜色 1 2 3 4 5 6 7 8 <div class ="svg-box" > <svg xmlns ="http://www.w3.org/2000/svg" viewBox ="0 0 500 250" > <path d ="m 0 0 L 0 250 L 20 250 A 1 1 0 0 1 478 250 L 500 250 L 500 0" fill ="currentColor" /> </svg > </div >
1 2 3 .svg-box {color : red;
关键:fill=”currentColor”
绝对定位:让子元素的层级比元素低 设置子元素的z-index为负数,并且父元素不能设置z-index。设置会导致失效。
1 2 3 <div class ="box" > <div class ="son" > </div > </div >
1 2 3 4 5 6 7 8 9 10 11 12 13 .box {position : relative;width : 200px ;height : 200px ;background : rgba (0 , 0 , 0 , 0.3 );.son {position : absolute;z-index : -2 ;width : 50px ;height : 50px ;background-color : pink;
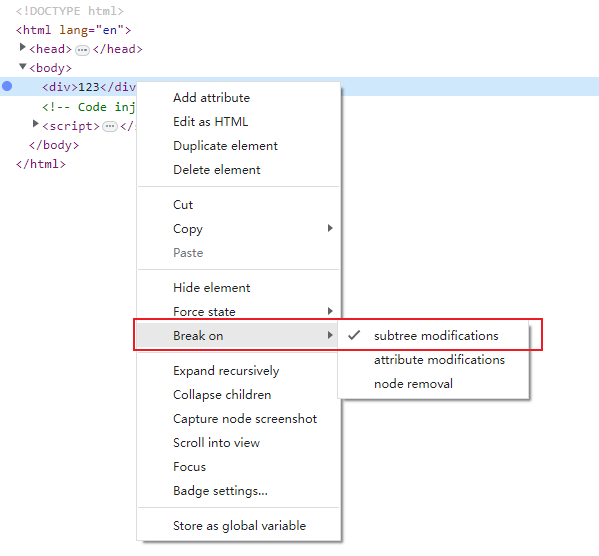
调试mouseenter事件后添加的样式 如果是比较小的一些变化的话,可以通过查看类名等之类的变化来定位元素。能定位就能先定位,再把鼠标移过去看具体的样式变化。
但是如果是mouseenter的时候添加的一些 dom 元素,就不太好定位了,因为没触发的时候都不在 dom 树上。
可以通过给父节点添加 DOM 断点的方式来调试,添加 DOM 断点后,mouseenter 时,添加 dom 元素会触发断点,然后在 source 面板单步跳过appendChild,这个时候再回来 Element 面板就能够查看具体的样式。
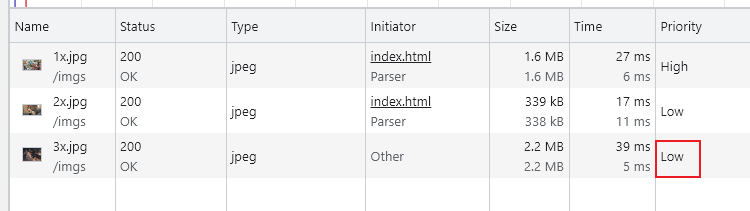
img 懒加载 设置loading属性为lazy。这样子非首屏的图片的优先级就会比较低,并且还有预加载功能。
1 <img src="./imgs/1x.jpg" alt="" loading="lazy" >
示例:
1 2 3 4 5 6 7 8 9 <div > <img src ="./imgs/1x.jpg" alt ="" loading ="lazy" /> </div > <div > <img src ="./imgs/2x.jpg" alt ="" loading ="lazy" /> </div > <div > <img src ="./imgs/3x.jpg" alt ="" loading ="lazy" /> </div >
1 2 3 4 5 6 div {height : 200vh ;img {height : 100% ;
background 层级
background支持多背景,写在前面的在最上面,写在最后面的在最下面。
背景色不能单独作为一层,但是渐变可以 。所以如果需要背景色在背景图片的上层,从而实现蒙版效果的话,可以使用渐变初始值跟渐变结束值一样的渐变层。
1 2 3 4 5 6 7 8 div {height : 200px ;background : -webkit-linear-gradient (rgba (0 , 0 , 0 , 0.7 ),rgba (0 , 0 , 0 , 0.7 )url ("./imgs/1x.jpg" );
多个背景的应用 - CSS:层叠样式表 | MDN
background 的层级观念 - 掘金
font-weight: 500 windows 不生效 font-weight 设置导致在 Windows 上网页不显示加粗效果 | ZRONG’s BLOG
杂 真机调试 如何用 Safari 联调 Hybrid APP-CSDN 博客
Chrome DevTools 远程调试安卓网页
PS:小米手机开启开发者选项需要额外操作才能有开发者选项:设置 -> 我的设备 -> 全部参数 -> 点击 7 次 MIUI 版本。点击完成后,才能在更多设置里看到开发者选项。
图片操作库
tinypng(质量较好,每月有限制,单张也有最大 5M 的限制)
jimp