Github Actions 定时任务
前言
前几天搞了一波Github Actions学到一波东西,撑着还有学习的热情,继续学一波Github Actions的定时任务。看的阮一峰大佬的天气预报博客,发现有很多有意思的知识点。
定时任务事件
实现CICD时,是通过监听push事件,即当我们push代码到github时会触发。同理,如果我们想要监听定时任务事件就是修改触发条件为定时任务,监听schedule。
1
2
3
4
| on:
push:
schedule:
- cron: '0 2,14 * * *'
|
上面的触发条件就是:每天国际标准时间2点和14点运行,即北京时间早上10点和晚上22点。当然也还包括push代码进仓库。
但是,只有这两种触发情况还是不太灵活,比如我们想要测试流水线,但是没到设定的时间。这时候就只能修改一点代码,push进仓库才能触发。
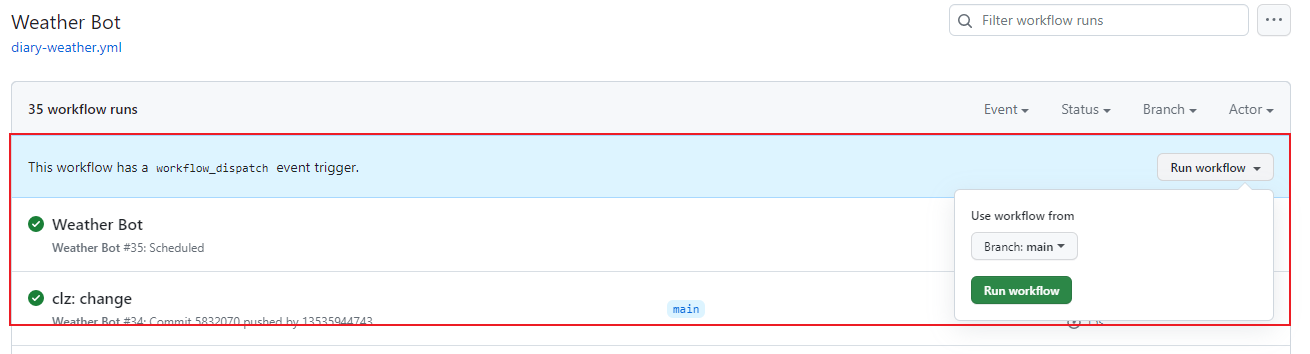
但是Github Actions是有提供一个workflow_dispatch事件的,添加之后,就能通过手动触发的方式来触发。
1
2
3
4
5
6
| name: 'Weather Bot'
on:
workflow_dispatch:
push:
schedule:
- cron: '0 2,14 * * *'
|
cron
cron的参数语法:
1
2
3
4
5
6
7
8
9
| ┌───────────── minute (0 - 59)
│ ┌───────────── hour (0 - 23)
│ │ ┌───────────── day of the month (1 - 31)
│ │ │ ┌───────────── month (1 - 12 or JAN-DEC)
│ │ │ │ ┌───────────── day of the week (0 - 6 or SUN-SAT)
│ │ │ │ │
│ │ │ │ │
│ │ │ │ │
* * * * *
|
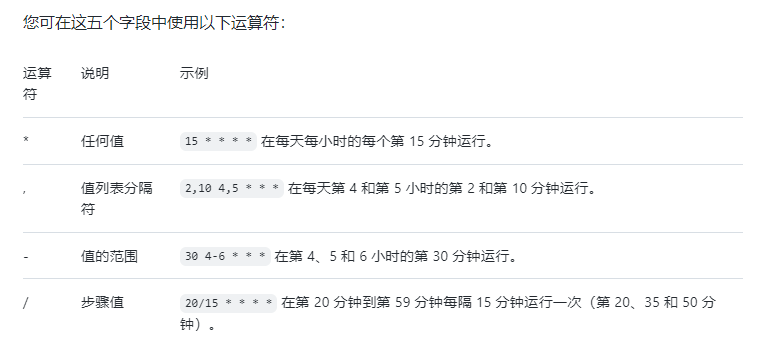
可以通过下面的网站来看实际的效果:
crontab guru
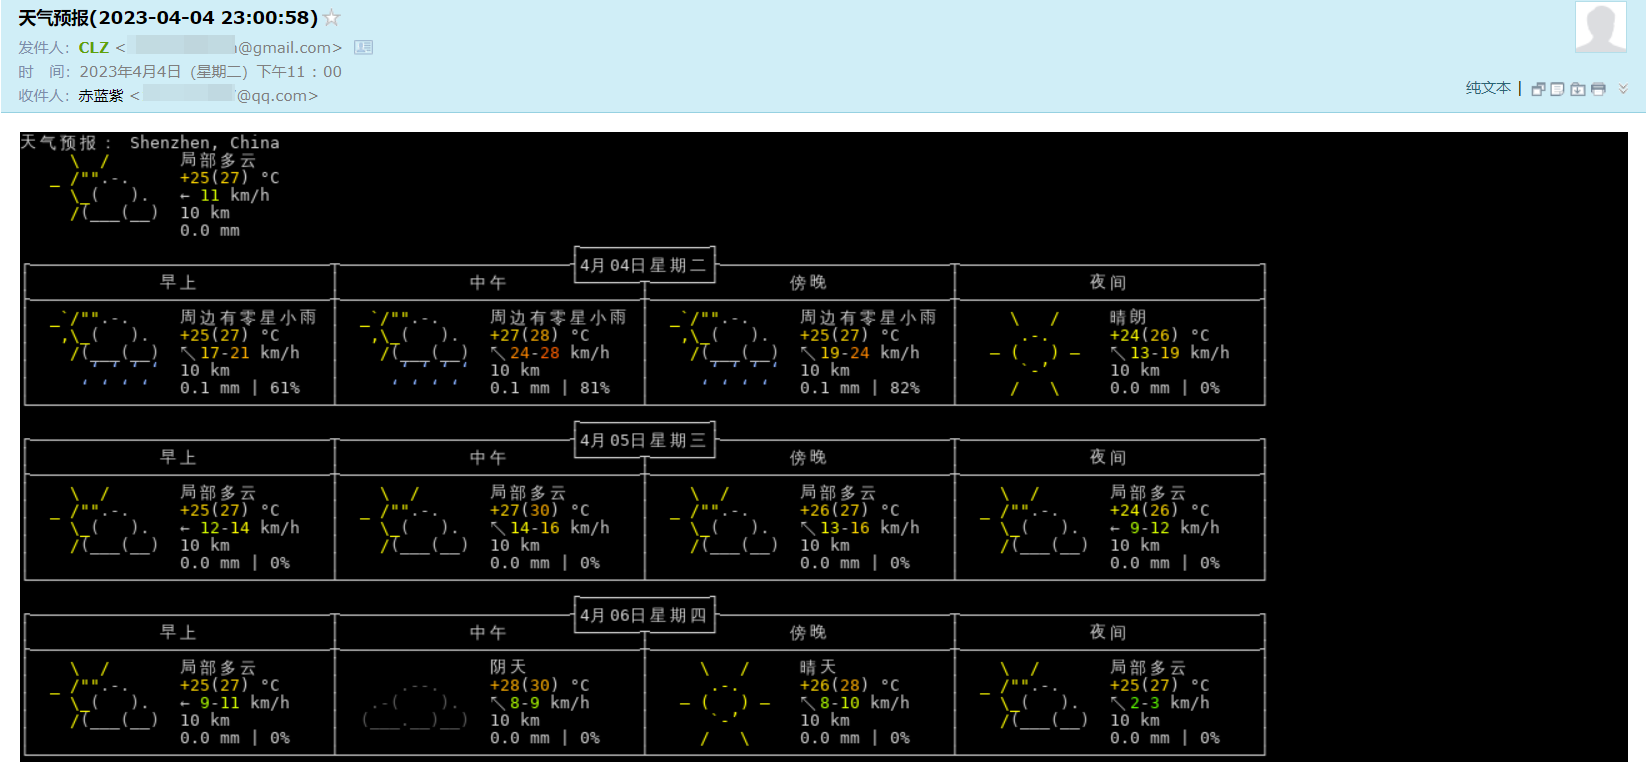
获取天气预报的图片,并生成html文件
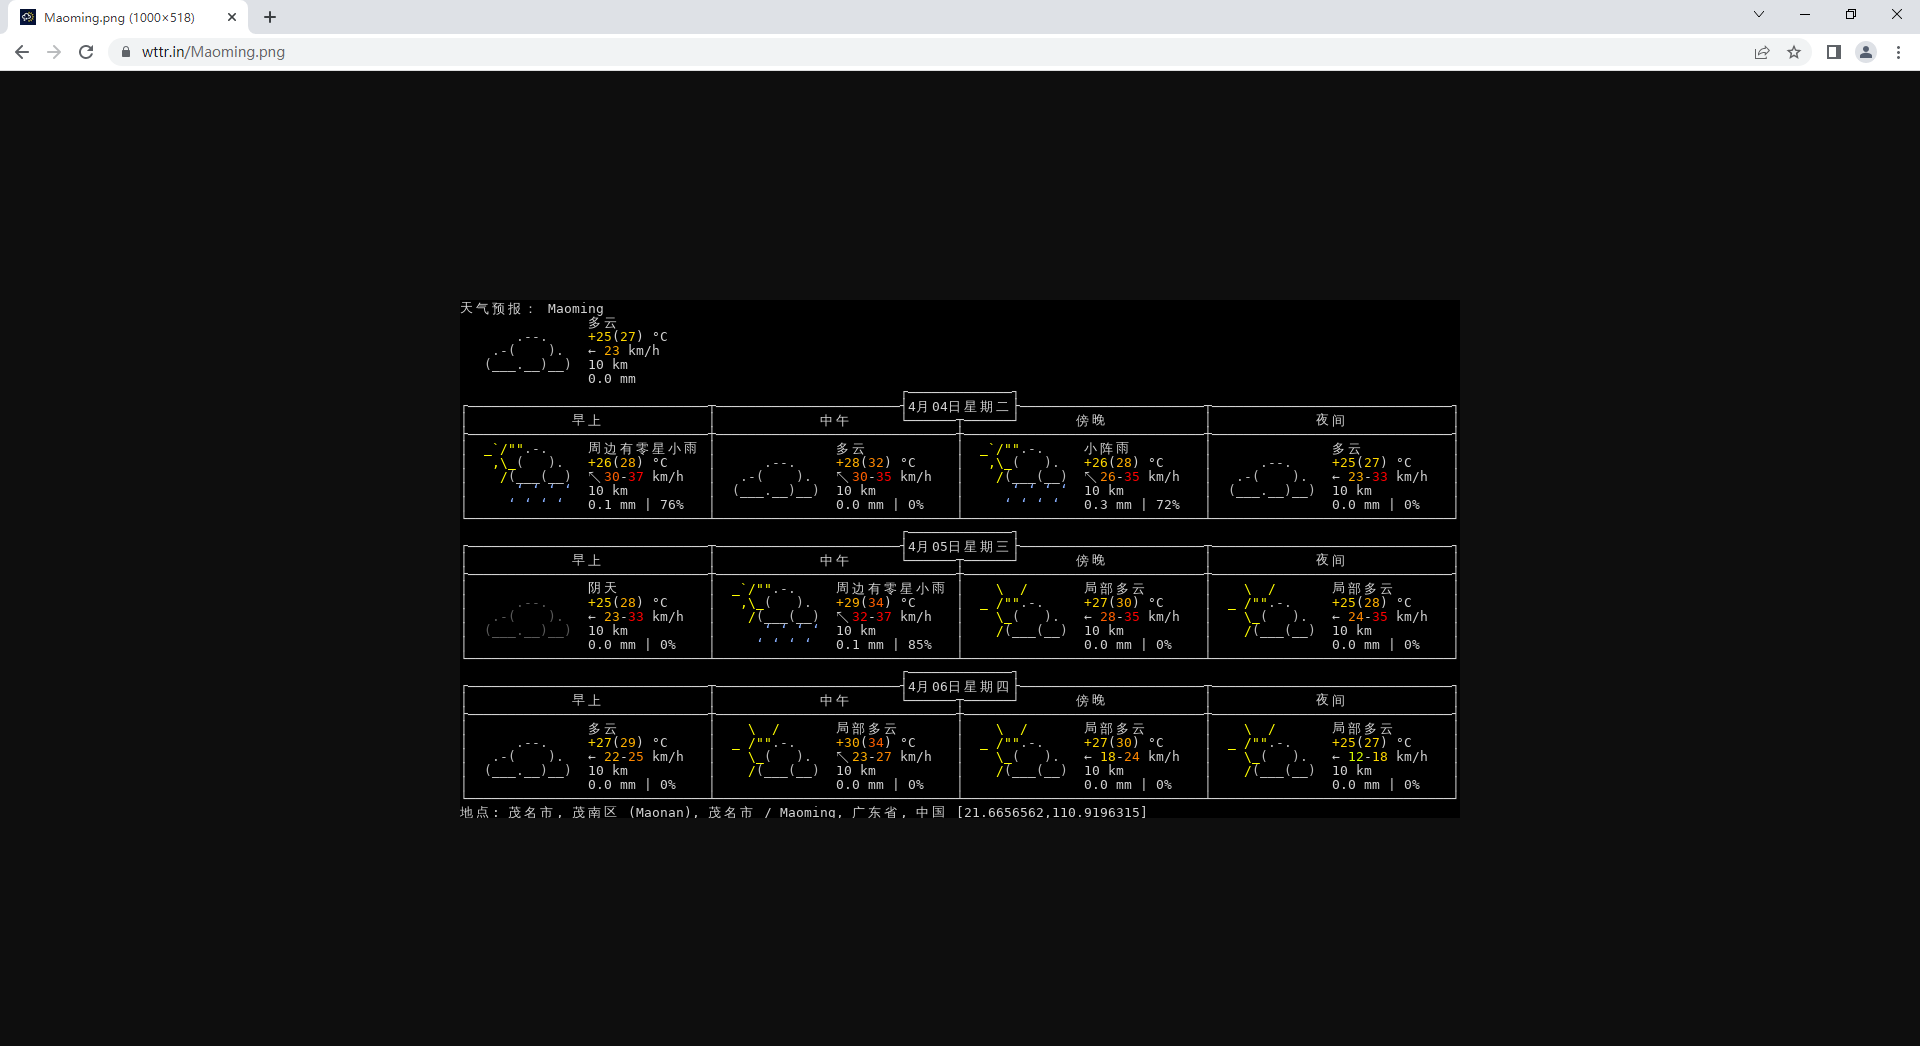
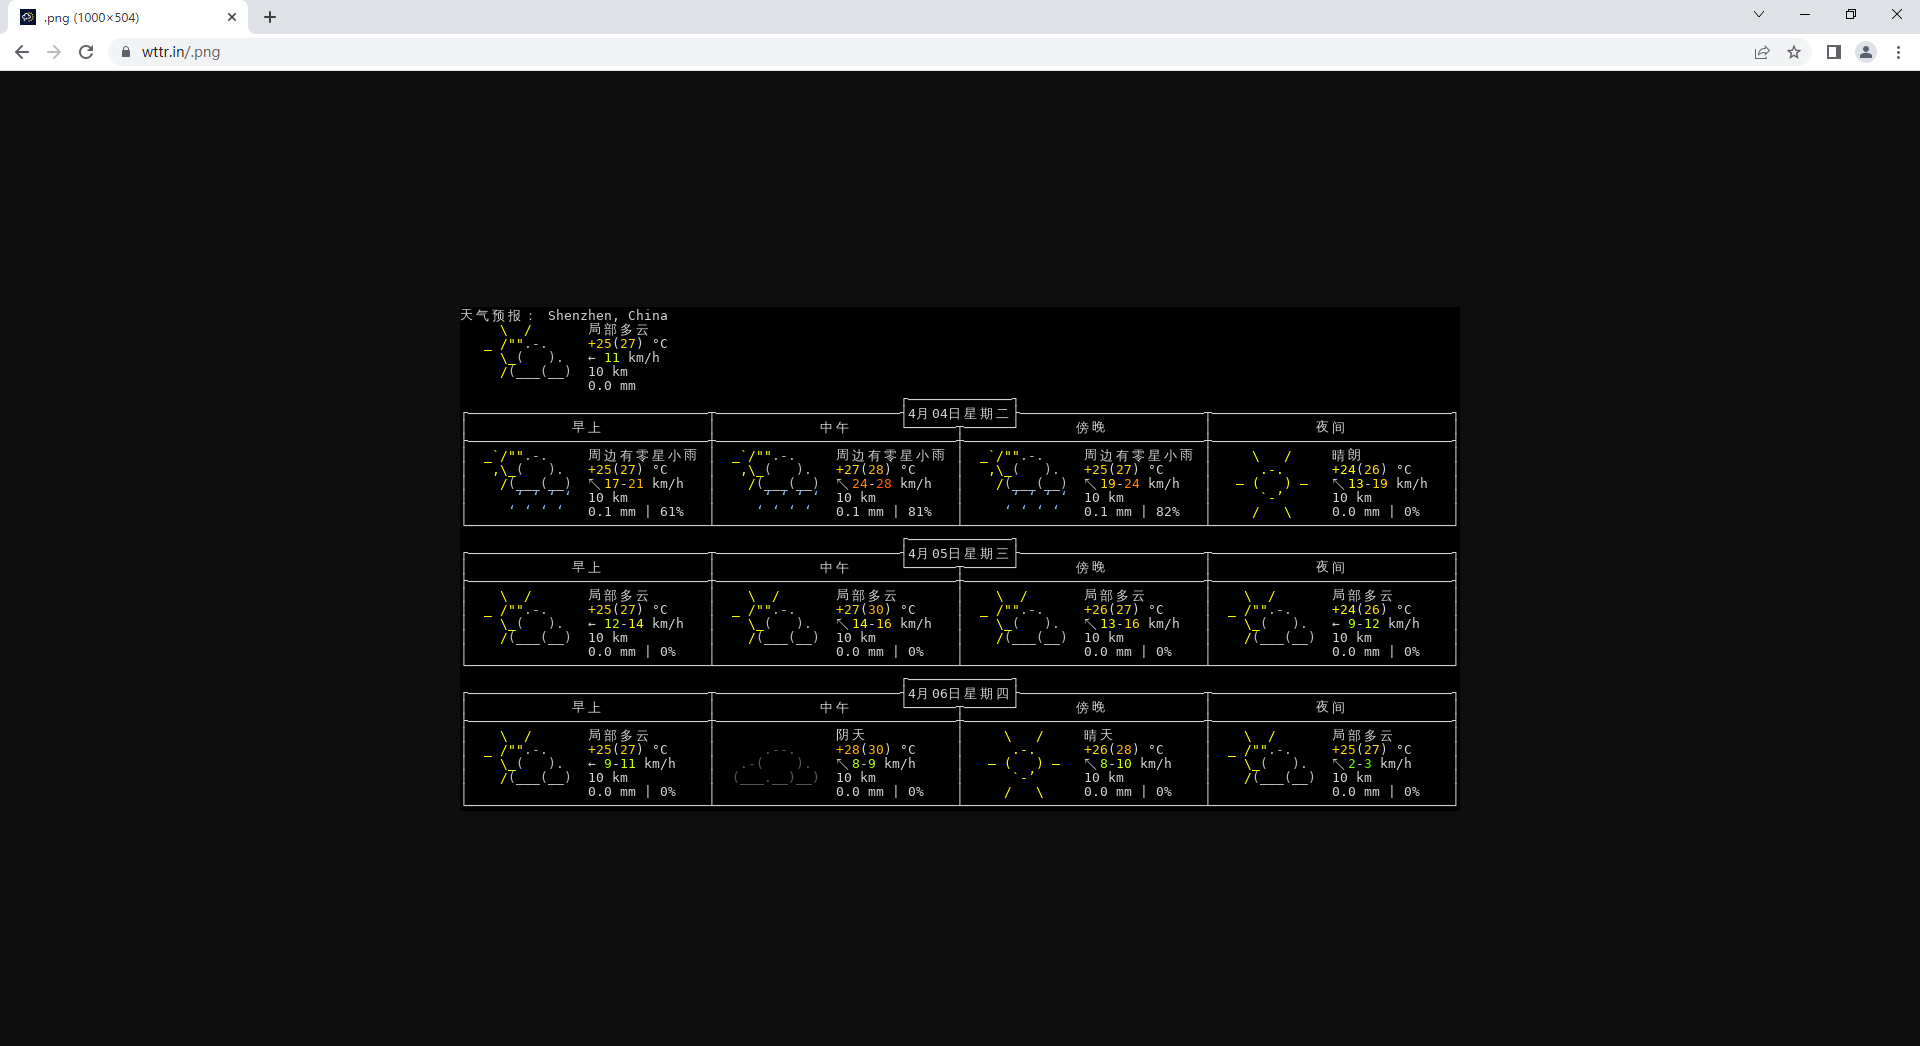
网站wttr.in可以请求天气预报,并且还会根据输入的url去返回内容。比如,再url里指定城市,就是得到指定城市的天气预报,没有指定则会自动检测位置,再得到天气预报。
而添加.png在url后面就能得到天气预报的图片。
指定城市:
不指定城市:
nodejs脚本:
1
2
3
4
5
6
7
8
9
10
11
12
13
14
15
16
17
18
19
20
21
22
23
24
25
26
27
28
29
| const fs = require('fs');
const CITY = '';
const result = `
<!DOCTYPE html>
<html lang="en">
<head>
<title>天气</title>
<style>
.container {
width: 100%;
background-color: #000;
}
</style>
</head>
<body>
<div class="container">
<img src="https://wttr.in/${CITY}.png" alt="${CITY}天气">
</div>
</body>
</html>
`;
fs.writeFile('./result.html', result, (err) => {
if (err) {
throw new Error(err);
}
})
|
运行代码后,就能够得到一个html文件,内容是一张天气预报图片。之后再用第三方actions实现将html发送给指定邮箱即可。
顺带一提,github Actions提供的虚拟机已经安装了node18,所以不需要安装node1
使用gmail的自动发送邮件服务
采用的方案是通过我的gmail给qq邮箱发信息,用到第三方Action action-send-mail来实现。使用方式如下:
因为它支持发送普通文本和html,所以采用的是html_body,值则是文件路径(所以是file协议)
1
2
3
4
5
6
7
8
9
10
11
12
| - name: 'Send mail'
uses: dawidd6/action-send-mail@master
with:
server_address: smtp.gmail.com
server_port: 465
secure: true
username: ${{secrets.MAIL_USERNAME}}
password: ${{secrets.MAIL_PASSWORD}}
subject: 天气预报
to: 1926389897@qq.com
from: CLZ
html_body: file://result.html
|
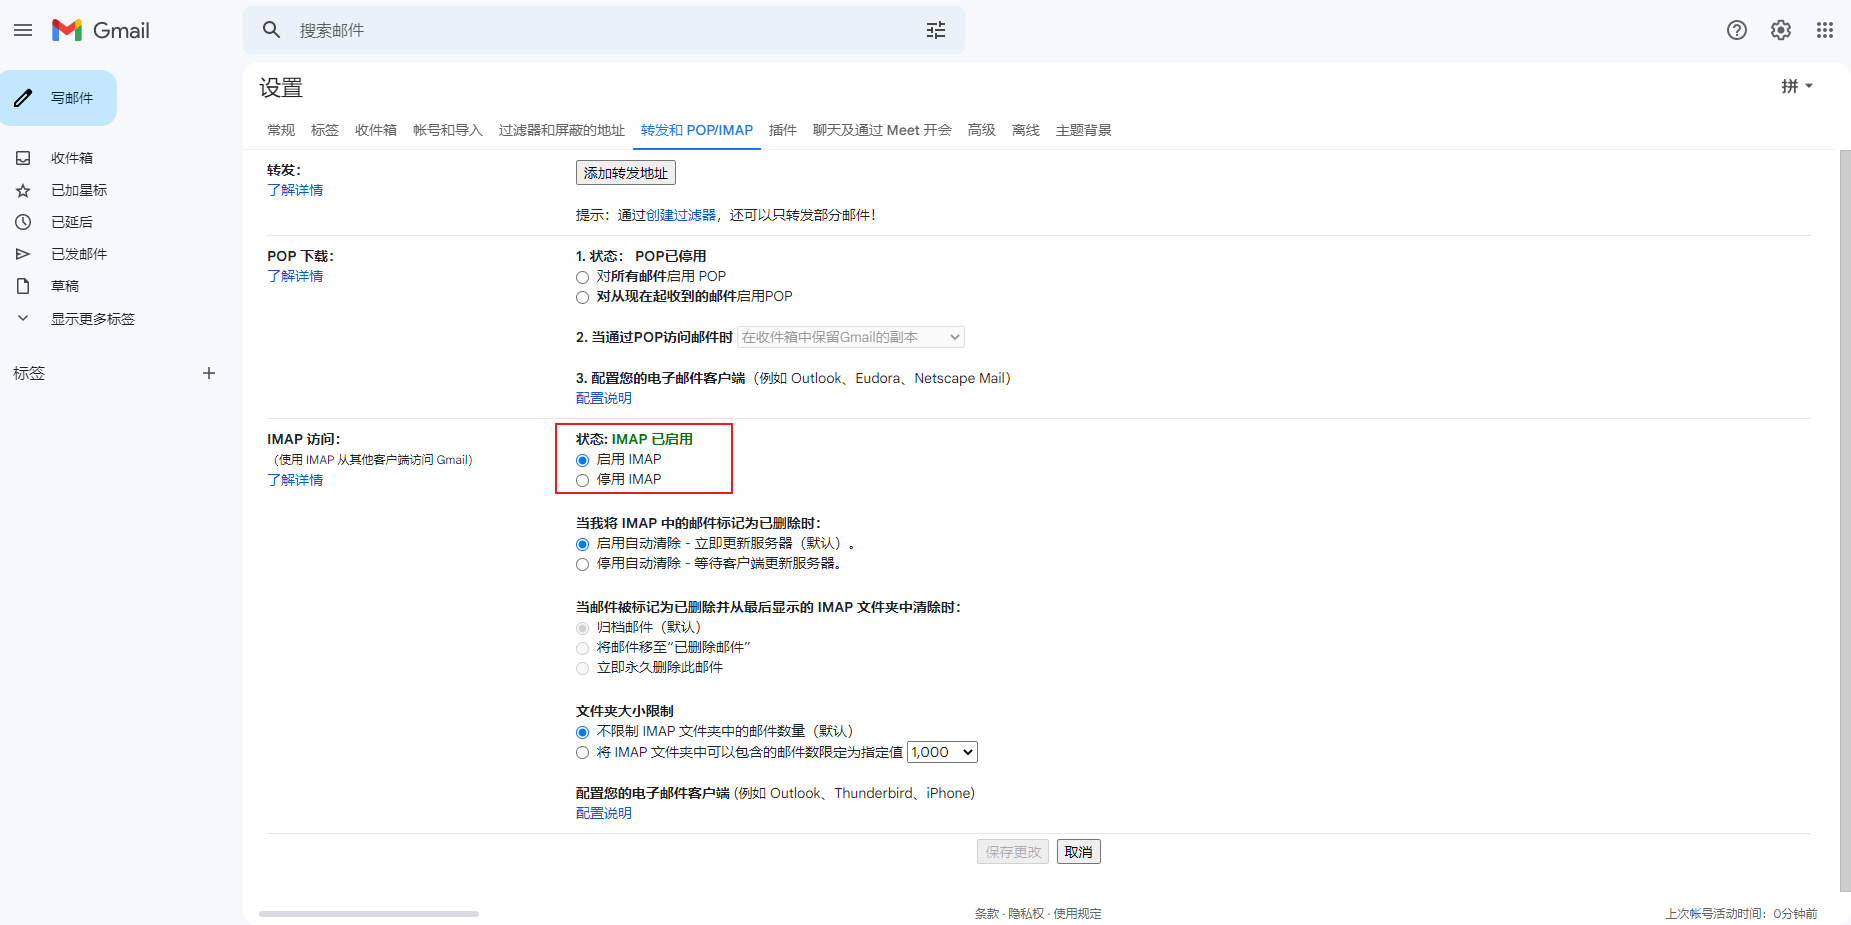
开启gmail的自动发送邮件的操作步骤:
设置
查看所有设置
转发和 POP/IMAP
开启IMAP
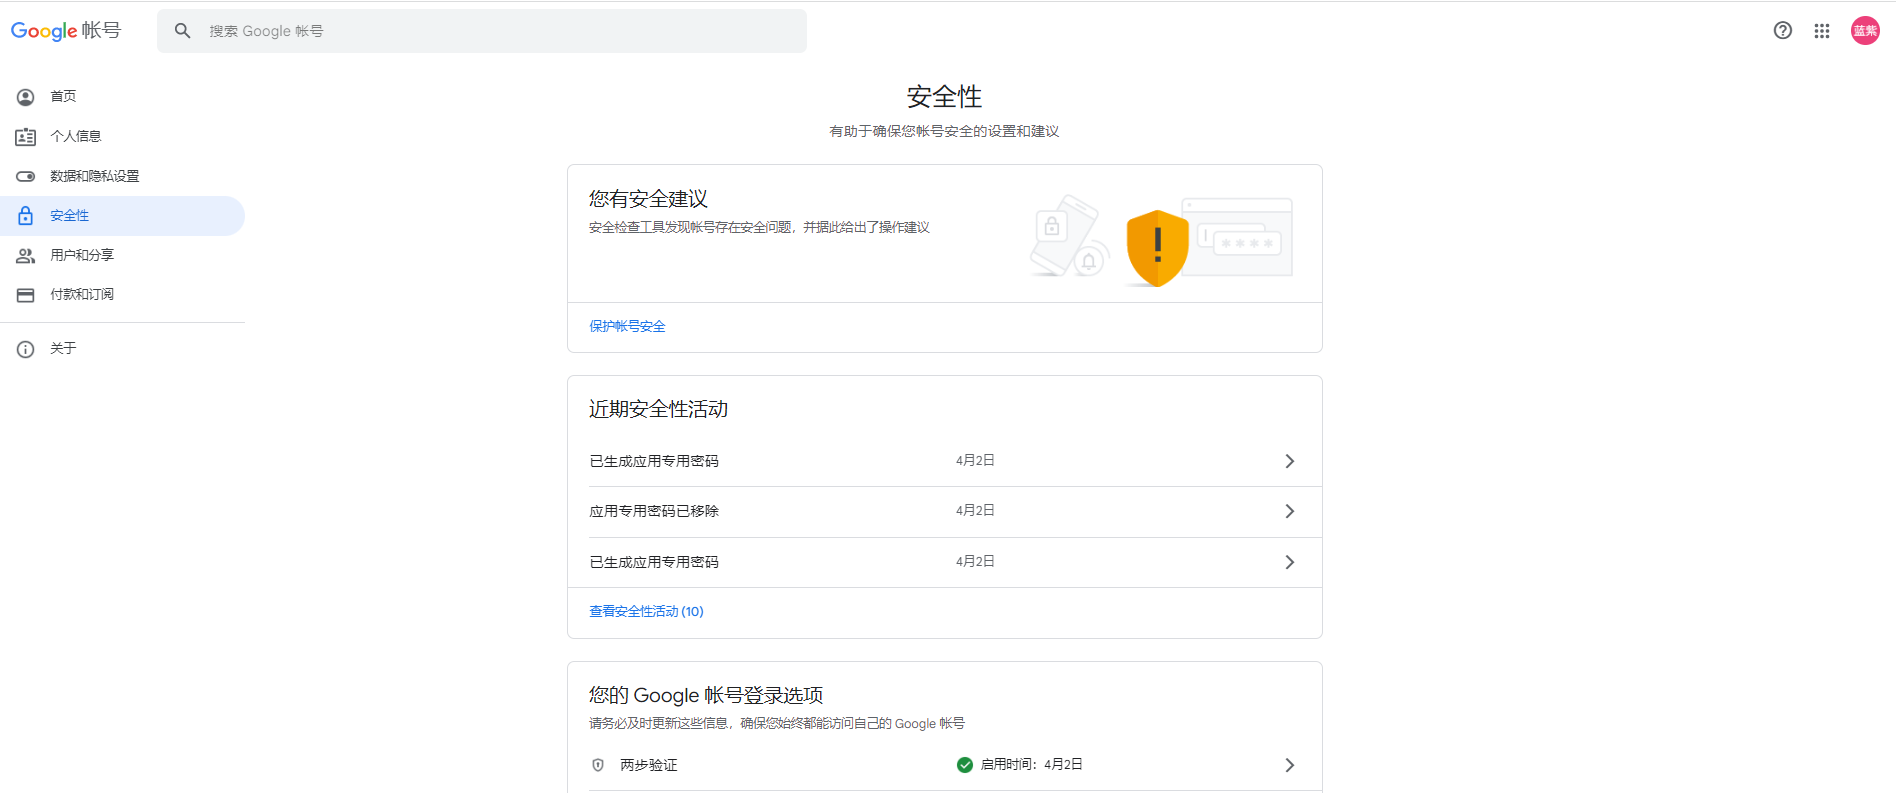
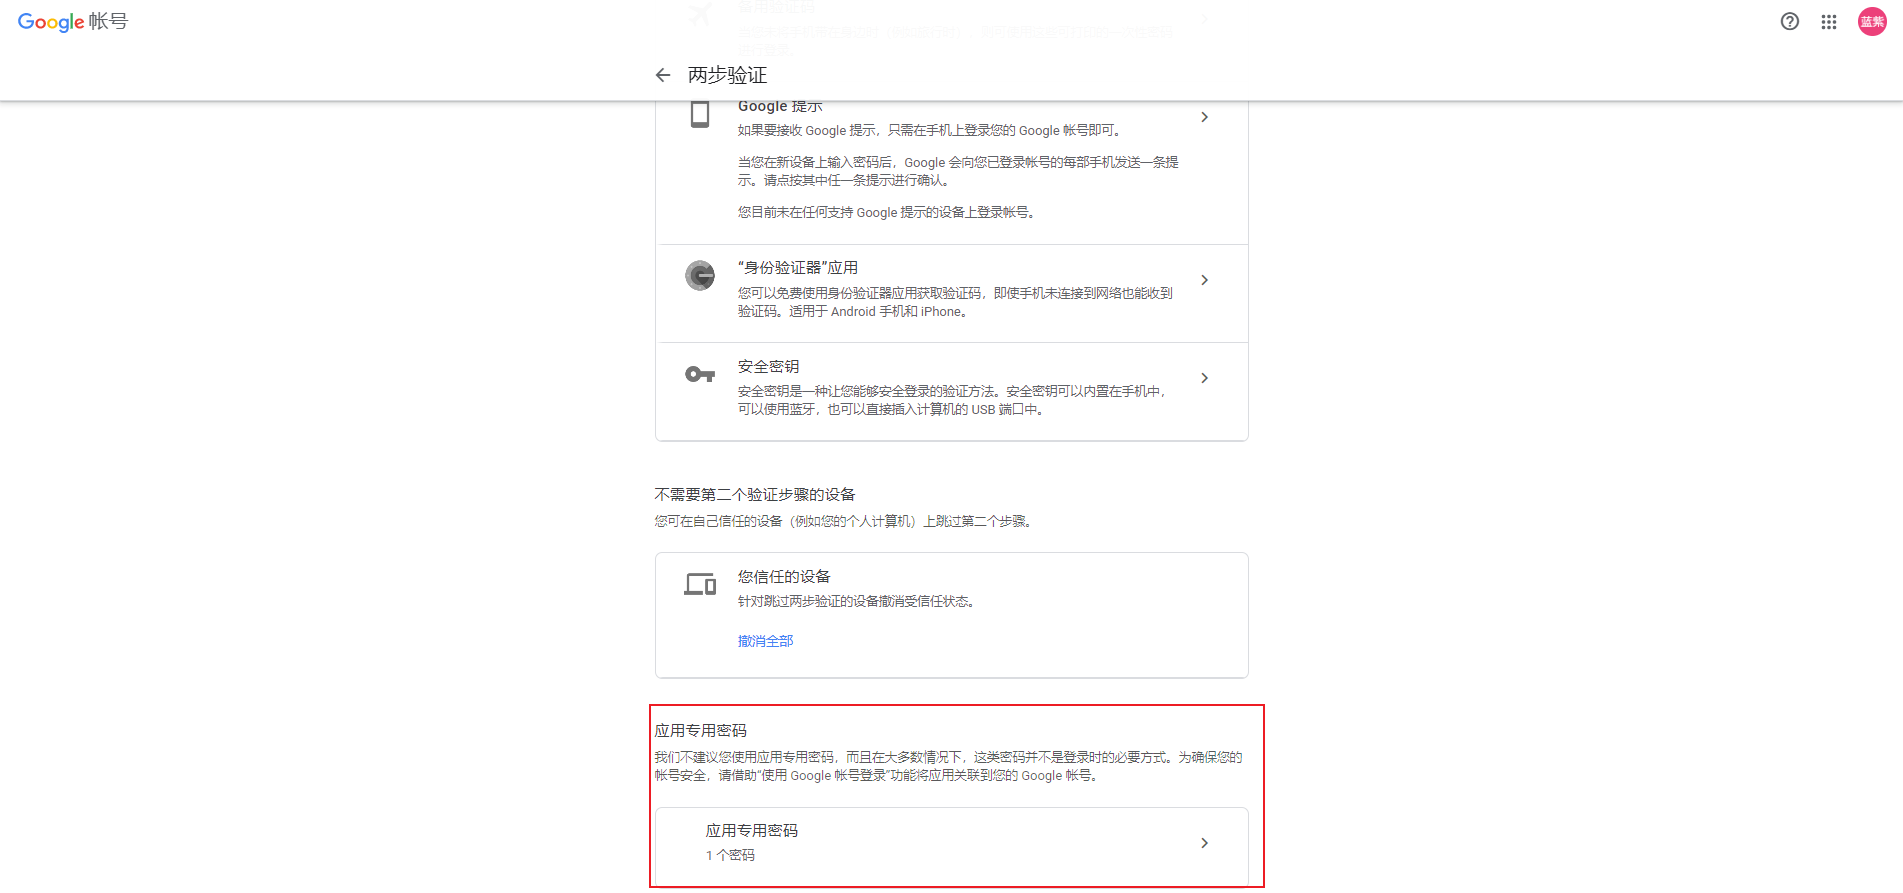
上面操作结束后,可能还不太行。经查资料,发现密码不应该是密码,而应该是生成的SMTP授权码。
而生成SMTP授权码也有两个步骤:
启用两部验证
https://myaccount.google.com/security
使用应用专用密码(这个密码就是要存在Actions secrets里的参数)
获取当前时间,并作为邮件标题
可以看下面的文章来
Linux终端查看当前时间和时间戳_linux获取当前时间戳_偷懒的加菲的博客-CSDN博客
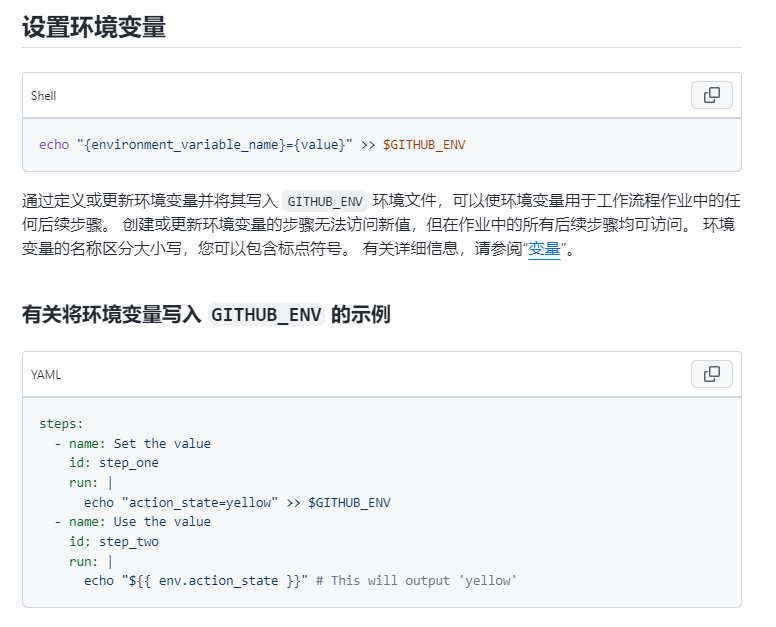
获取当前时间作为一个step,而发送邮件是另一个step,那么怎么实现将step的变量传递给另一个step呢?答案就在Github Actions的文档里:
GitHub Actions 的工作流命令 - GitHub 文档
1
2
3
| - name: 'Get Date'
run: |
echo "REPORT_DATE=$(date '+%Y-%m-%d %T')" >> $GITHUB_ENV
|
按上面的方式改后,会发现时间可能和本地的时间对不上。因为虚拟机的时区并不是我们在的时区,所以需要进行时区的修改,才能时间时间对上。
方法:linux修改系统时间和linux查看时区、修改时区的方法 - 简书
1
2
3
4
5
| - name: 'Get Date'
run: |
export TZ='Asia/Shanghai' # 修改时区
source ~/.bashrc # 使时区生效
echo "REPORT_DATE=$(date '+%Y-%m-%d %T')" >> $GITHUB_ENV
|
上面的方式就能实现了,但是也可以和得到时间的部分混合使用,减少代码量:
1
2
3
| - name: 'Get Date'
run: |
echo "REPORT_DATE=$(TZ='Asia/Shanghai' date '+%Y-%m-%d %T')" >> $GITHUB_ENV
|
效果和之前的一样。
完整workflow以及脚本
workflow
1
2
3
4
5
6
7
8
9
10
11
12
13
14
15
16
17
18
19
20
21
22
23
24
25
26
27
28
29
30
31
32
33
| name: 'Weather Bot'
on:
workflow_dispatch:
push:
schedule:
- cron: '0 2,14 * * *'
jobs:
bot:
runs-on: ubuntu-latest
steps:
- name: 'Checkout'
uses: actions/checkout@v3
- name: 'GET Weather'
run: |
node -v
node ./weather.js
cat ./result.html
- name: 'Get Date'
  run: |
    echo "REPORT_DATE=$(TZ='Asia/Shanghai' date '+%Y-%m-%d %T')" >> $GITHUB_ENV
- name: 'Send mail'
uses: dawidd6/action-send-mail@master
with:
server_address: smtp.gmail.com
server_port: 465
secure: true
username: ${{secrets.MAIL_USERNAME}}
password: ${{secrets.MAIL_PASSWORD}}
subject: 天气预报(${{env.REPORT_DATE}})
to: 1926389897@qq.com
from: CLZ
html_body: file://result.html
|
脚本weather.js
1
2
3
4
5
6
7
8
9
10
11
12
13
14
15
16
17
18
19
20
21
22
23
24
25
26
27
28
29
30
| const fs = require('fs');
const CITY = '';
const result = `
<!DOCTYPE html>
<html lang="en">
<head>
<title>天气</title>
<style>
.container {
width: 100%;
/* height: 100%; */
background-color: #000;
}
</style>
</head>
<body>
<div class="container">
<img src="https://wttr.in/${CITY}.png" alt="${CITY}天气">
</div>
</body>
</html>
`;
fs.writeFile('./result.html', result, (err) => {
if (err) {
throw new Error(err);
}
})
|
参考:
GitHub Actions 的工作流命令 - GitHub 文档
触发工作流的事件 - GitHub 文档
Linux终端查看当前时间和时间戳_linux获取当前时间戳_偷懒的加菲的博客-CSDN博客
linux修改系统时间和linux查看时区、修改时区的方法 - 简书
javascript - Why does a fetch request causes server to return 403 while XMLHttpRequest does not? - Stack Overflow