Element Plus修改表格行、单元格样式
前言
实习工作需要根据表格的状态字段来设置行的样式,记录一波。
先来一下基础配置。(Vue3)
1
2
3
4
5
6
7
8
9
10
11
12
13
14
15
16
17
18
19
20
21
22
23
24
25
26
27
28
29
30
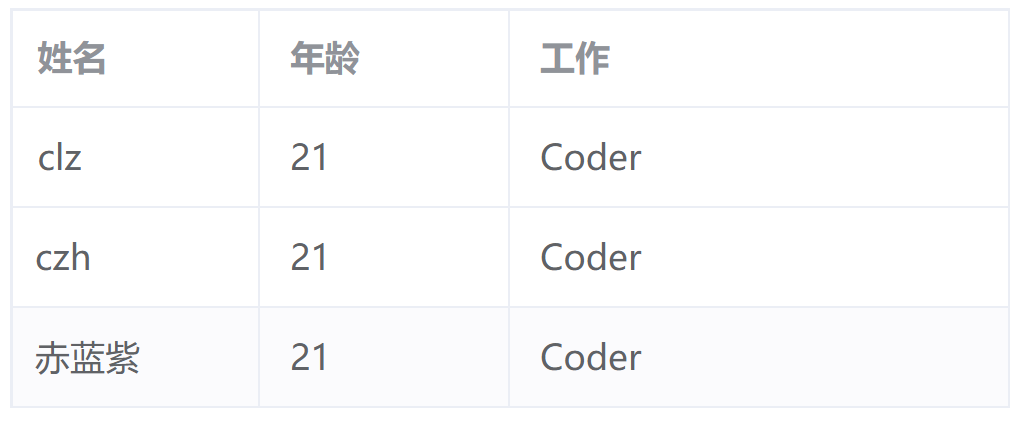
| <template>
<el-table :data="tableData" border style="width: 400px">
<el-table-column prop="name" label="姓名" width="100" />
<el-table-column prop="age" label="年龄" width="100" />
<el-table-column prop="job" label="工作" />
</el-table>
</template>
<script setup>
const tableData = [
{
name: "clz",
age: 21,
job: "Coder",
},
{
name: "czh",
age: 21,
job: "Coder",
},
{
name: "赤蓝紫",
age: 21,
job: "Coder",
},
];
</script>
<style lang="less" scoped>
</style>
|
设置某一行的样式
主要是通过 row-style属性来实现。它是行的 style的回调方法,可以通过它来实现设置某一行的样式。
先让我们来体验一下它的参数都是些什么。
1
2
3
4
5
6
7
| <el-table
style="width: 400px"
border
:data="tableData"
:row-style="rowState"
>
</el-table>
|
1
2
3
| const rowState = (arg) => {
console.log(arg)
}
|
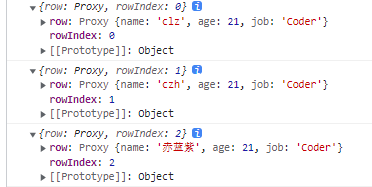
可以发现,它是一个对象,一个属性是行的数据,一个是行号(从0开始),至于不只是打印3次,而是打印9次的原因还没发现,后面单元格的会打印18次,9个单元格打印18次。但是这个并不是本次的研究重点。
那么,我们怎样能设置样式呢?
只需要返回含有属性样式的对象即可。(驼峰命名法)
1
2
3
4
5
6
| const rowState = (arg) => {
return {
backgroundColor: 'pink',
color: '#fff'
}
}
|

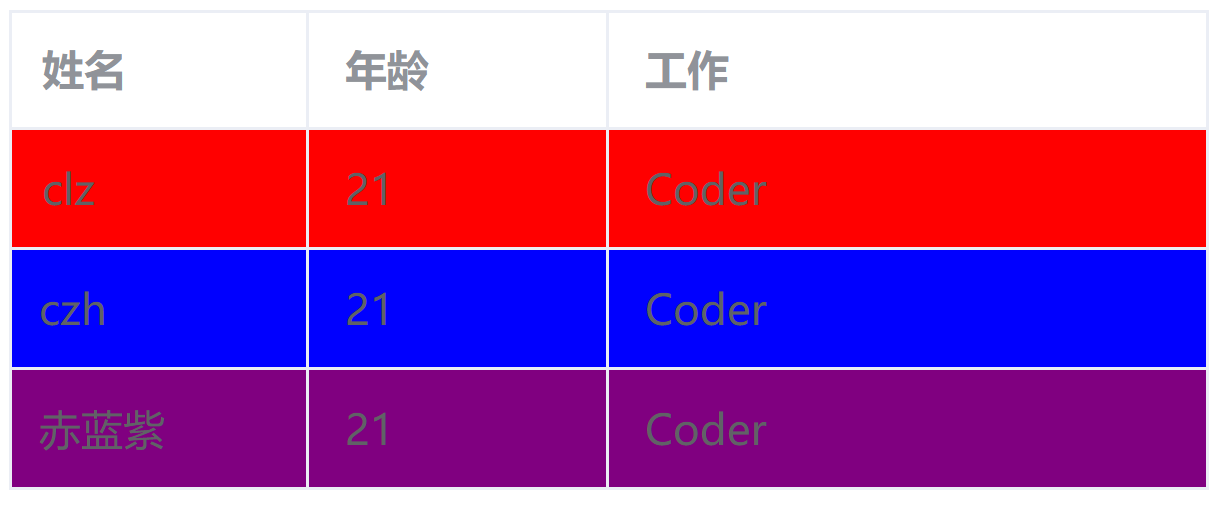
然后在搭配参数使用,就能实现根据表格内容设置行的样式。
1
2
3
4
5
6
7
8
9
10
11
12
13
14
15
16
17
18
19
20
21
22
23
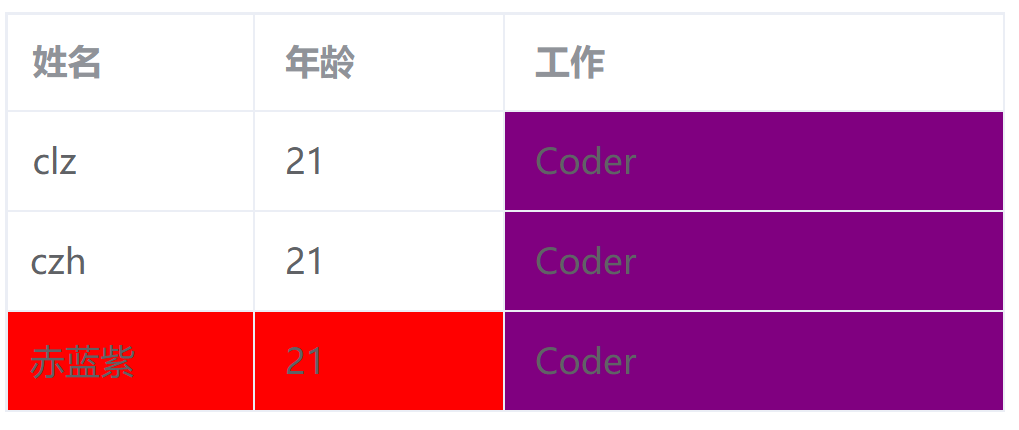
| const rowState = ({ row }) => {
let style = {}
switch (row.name) {
case 'clz':
style = {
backgroundColor: 'red'
}
break;
case 'czh':
style = {
backgroundColor: 'blue'
}
break;
case '赤蓝紫':
style = {
backgroundColor: 'purple'
}
break;
}
return style;
}
|
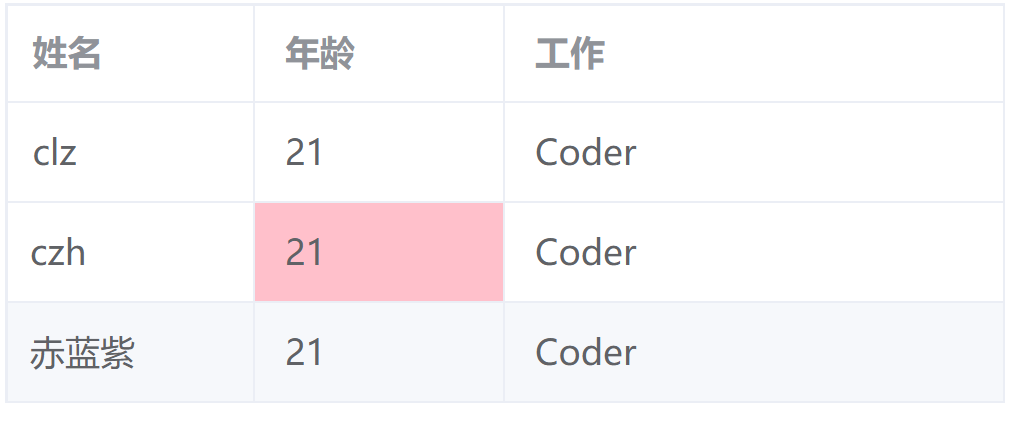
设置某一个单元格的样式
通过 cell-style属性来实现。做法和上面一样,就不多说了,主要的四个参数 row, column, rowIndex, columnIndex。
row:行的信息column:列的信息rowIndex: 行数(0开始算)columnIndex:列数(0开始算)
1
2
3
4
5
6
7
| <el-table
style="width: 400px"
border
:data="tableData"
:cell-style="cellStyle"
>
</el-table>
|
1
2
3
4
5
6
7
| const cellStyle = ({ row, column, rowIndex, columnIndex }) => {
if (rowIndex === 1 && columnIndex === 1) {
return {
backgroundColor: 'pink'
}
}
}
|
其实,cell-state不只是能设置单元格的样式,因为它的参数中含有 row和 column,所以还可以用来设置某一行或某一列的样式。
1
2
3
4
5
6
7
8
9
10
11
12
13
14
15
| const cellStyle = ({ row, column, rowIndex, columnIndex }) => {
if (column.label === '工作') {
return {
backgroundColor: 'purple'
}
}
if (row.name === '赤蓝紫') {
return {
backgroundColor: 'red'
}
}
}
|
注意,这里重叠的地方并不会出现后来的样式覆盖掉前面的样式,而是先到先得
表头样式修改(赠品)
特殊的表头,特殊的处理
header-row-style:只有一个rowIndex属性
1
2
3
4
5
6
7
8
| const headerRowStyle = (args) => {
console.log(args)
return {
height: '100px',
backgroundColor: 'red'
}
}
|
发现只有标头的行高有所变化,这是为啥呢?
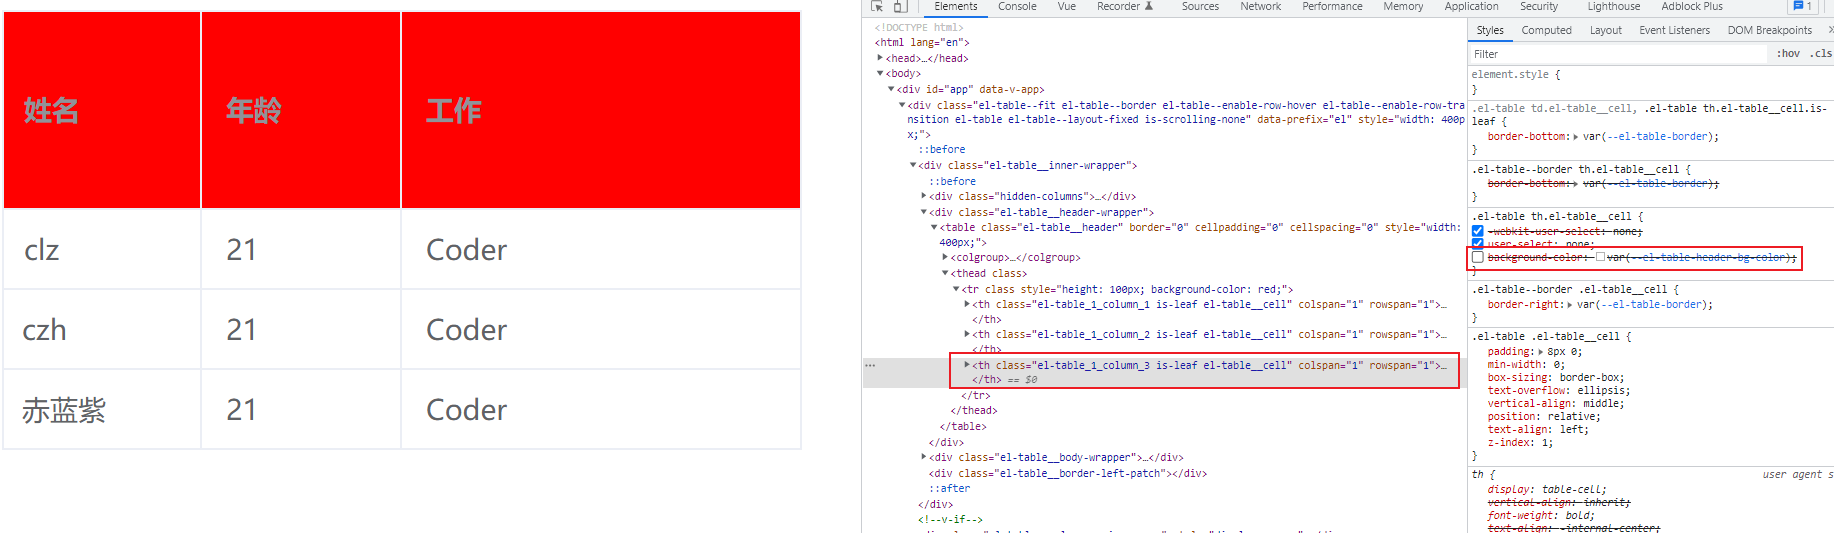
检查样式发现,这是因为单元格本身具有背景颜色,所以并不会生效。
header-row-style:和正常的单元格一样,有四个属性
1
2
3
4
5
6
7
| const headerCellStyle = ({ row, column, rowIndex, columnIndex }) => {
if (columnIndex === 1) {
return {
backgroundColor: 'pink'
}
}
}
|
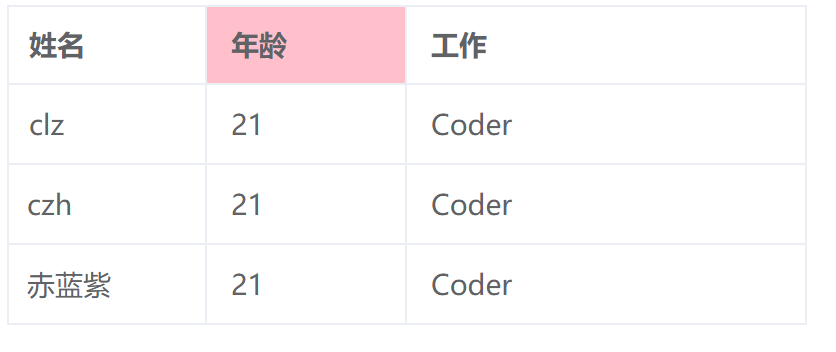
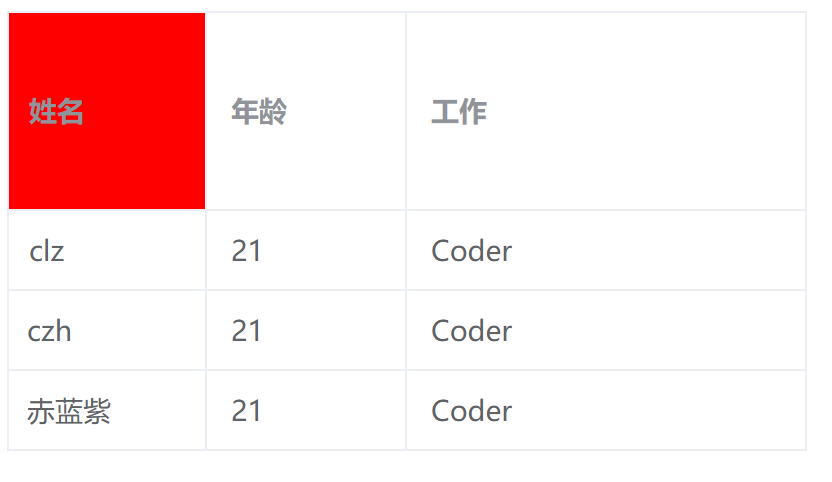
也可以通过column属性来设置符合条件的表头单元格的样式。
1
2
3
4
5
6
7
8
| const headerCellStyle = ({ row, column, rowIndex, columnIndex }) => {
if (column.label === '姓名') {
return {
backgroundColor: 'red'
}
}
}
|
\