Node.js 笔记
参加字节跳动的青训营时写的笔记。这部分是欧阳亚东老师讲的课。
1. 应用场景
- 前端工程化
- Web 服务端应用
- 运行效率接近常见的编译语言
- 社区生态丰富、工具链成熟(npm,V8 inspector)
- 与前端结合的场景有优势(服务端渲染 SSR)
- Electron 跨端桌面应用
- 商业应用:vscode, slack, discord
- 大型公司内的效率工具
2. 运行时结构
- V8:JavaScript Runtime,诊断调试工具(inspector)
- libuv:eventloop(事件循环),syscall(系统调用)
2.1 特点
3. 编写 Http Server
之前的笔记
3.1 Hello
1
2
3
4
5
6
7
8
9
10
11
| const http = require("http");
const port = 8081;
const server = http.createServer((req, res) => {
res.end("Hello");
});
server.listen(port, () => {
console.log(`Listen at ${port}`);
});
|
3.2 JSON 数据
用户把 JSON 数据 POST 给服务器,服务器再把数据中的 msg 取出来,返回给用户
服务器端:
1
2
3
4
5
6
7
8
9
10
11
12
13
14
15
16
17
18
19
20
21
22
23
24
25
26
27
28
29
30
31
| const http = require("http");
const server = http.createServer((req, res) => {
const bufs = [];
req.on("data", (buf) => {
bufs.push(buf);
});
req.on("end", () => {
const buf = Buffer.concat(bufs).toString("utf8");
let msg = "Hello";
try {
const ret = JSON.parse(buf);
msg = ret.msg;
} catch (err) {
}
const responseJson = {
msg: `receive: ${msg}`,
};
res.setHeader("Content-Type", "application/json");
res.end(JSON.stringify(responseJson));
});
});
const port = 8081;
server.listen(port, () => {
console.log(`Listen at ${port}`);
});
|
客户端:
1
2
3
4
5
6
7
8
9
10
11
12
13
14
15
16
17
18
19
20
21
22
23
24
25
26
27
28
29
| const http = require("http");
const body = JSON.stringify({
msg: "Hello from client",
});
const req = http.request(
"http:/127.0.0.1:8081",
{
method: "POST",
headers: {
"Content-Type": "application/json",
},
},
(res) => {
const bufs = [];
res.on("data", (buf) => {
bufs.push(buf);
});
res.on("end", () => {
const buf = Buffer.concat(bufs);
const json = JSON.parse(buf);
console.log("json msg is: ", json.msg);
});
}
);
req.end(body);
|
先打开服务器端,再打开客户端。(第一个文件为 json.js,第二个为 client.js。则先执行 node json.js,再执行 node client.js)
收到返回信息:

3.3 用 Promise + async await 重写 3.2
技巧:将 callback 转换成 promise
不是所有的回调函数都适合转换成 promise,而是只调用一次的回调函数才适合转换为 promise。即 createServer()不适合转换为 promise。
json.js 修改后(输出结果一样)
1
2
3
4
5
6
7
8
9
10
11
12
13
14
15
16
17
18
19
20
21
22
23
24
25
26
27
28
29
30
31
32
33
34
35
36
37
38
39
40
41
42
| const http = require("http");
const server = http.createServer(async (req, res) => {
const msg = await new Promise((resolve, reject) => {
const bufs = [];
req.on("error", (err) => {
reject(err);
});
req.on("data", (buf) => {
bufs.push(buf);
});
req.on("end", () => {
const buf = Buffer.concat(bufs).toString("utf8");
let msg = "Hello";
try {
const ret = JSON.parse(buf);
msg = ret.msg;
} catch (err) {
}
resolve(msg);
});
});
const responseJson = {
msg: `receive: ${msg}`,
};
res.setHeader("Content-Type", "application/json");
res.end(JSON.stringify(responseJson));
});
const port = 8081;
server.listen(port, () => {
console.log(`Listen at ${port}`);
});
|
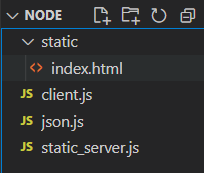
3.4 静态文件服务
1
2
3
4
5
6
7
8
9
10
11
12
13
14
15
| <!DOCTYPE html>
<html lang="en">
<head>
<meta charset="UTF-8" />
<meta http-equiv="X-UA-Compatible" content="IE=edge" />
<meta name="viewport" content="width=device-width, initial-scale=1.0" />
<title>Document</title>
</head>
<body>
<p>Hello</p>
<script>
alert("Hello");
</script>
</body>
</html>
|
static_server.js
1
2
3
4
5
6
7
8
9
10
11
12
13
14
15
16
17
18
19
20
21
22
| const http = require("http");
const fs = require("fs");
const path = require("path");
const url = require("url");
const folderPath = path.join(__dirname, "static");
const server = http.createServer((req, res) => {
const info = url.parse(req.url);
const filePath = path.join(folderPath, info.path);
const filestream = fs.createReadStream(filePath);
filestream.pipe(res);
});
const port = 8081;
server.listen(port, () => {
console.log(`Listen at ${port}`);
});
|
执行 node static_server.js 后,打开 http://localhost:8081/index.html
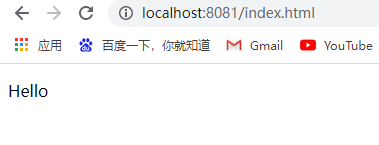
之后会报点小错,因为没有 ico 图标(忽视就好)
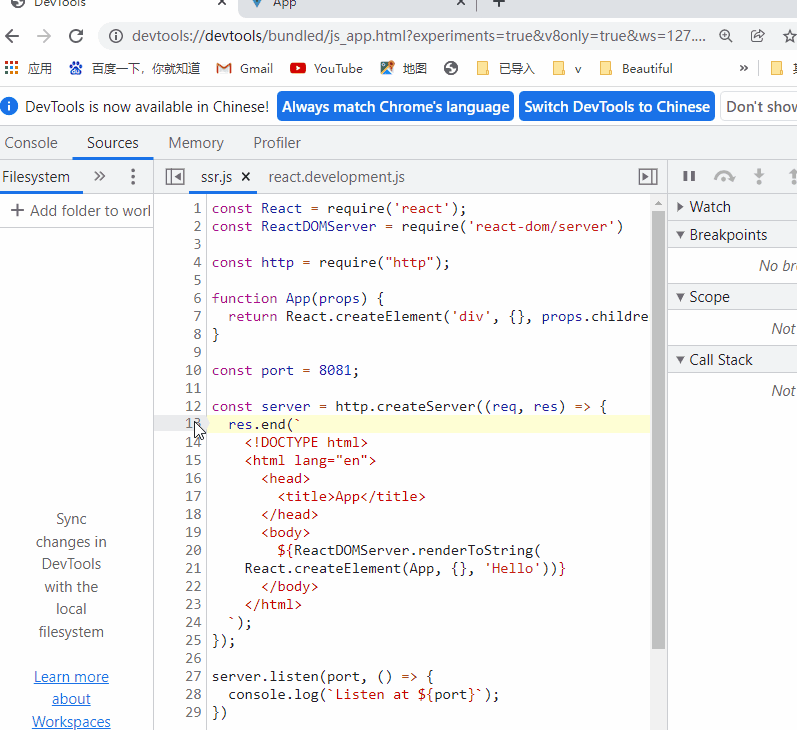
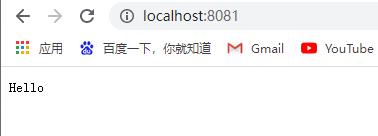
3.5 React SSR
SSR(server side rendering):服务端渲染
- 相对于传统 HTML 模板引擎:可以避免重复编写代码
- 相比于 SPA:首屏渲染更快,SEO 友好(SPA 应用需要加载完所有的 js 代码后,才可以给用户返回数据)
首先要先安装 react 相关的包, npm i react react-dom
下面就是通过 React SSR 实现显示 Hello 的代码(有一点不太明白,还是得等会用 ReactDOM、ReactDOMServer 模块)
ssr.
1
2
3
4
5
6
7
8
9
10
11
12
13
14
15
16
17
18
19
20
21
22
23
24
25
26
27
28
| const React = require("react");
const ReactDOMServer = require("react-dom/server");
const http = require("http");
function App(props) {
return React.createElement("div", {}, props.children || "Hello");
}
const port = 8081;
const server = http.createServer((req, res) => {
res.end(`
<!DOCTYPE html>
<html lang="en">
<head>
<title>App</title>
</head>
<body>
${ReactDOMServer.renderToString(React.createElement(App, {}, "Hello"))}
</body>
</html>
`);
});
server.listen(port, () => {
console.log(`Listen at ${port}`);
});
|
3.6 Debug
V8 Inspector:开箱即用、与前端开发已知、跨平台
场景:
- 查看 console.log 内容
- breakpoint
- 性能分析
使用:
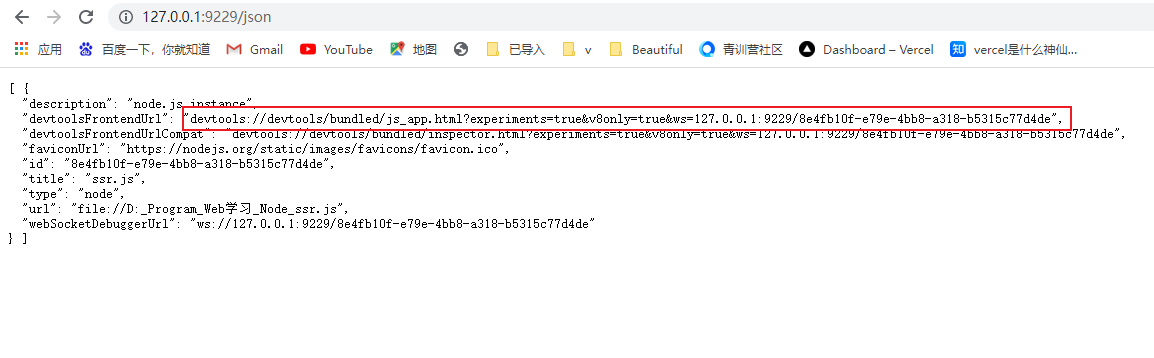
node --inspect ssr.js
打开http://127.0.0.1:9229/json
复制打开下图红框内容
进入下图界面
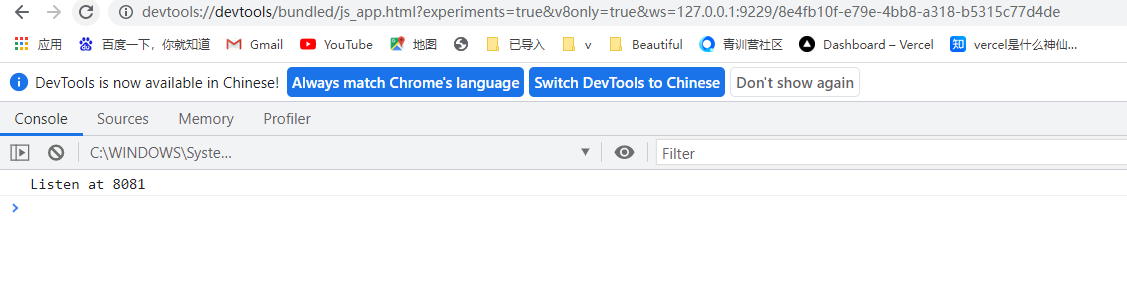
控制台显示连接上

对于阻塞的情况,可以使用 log point,相当于 console.log